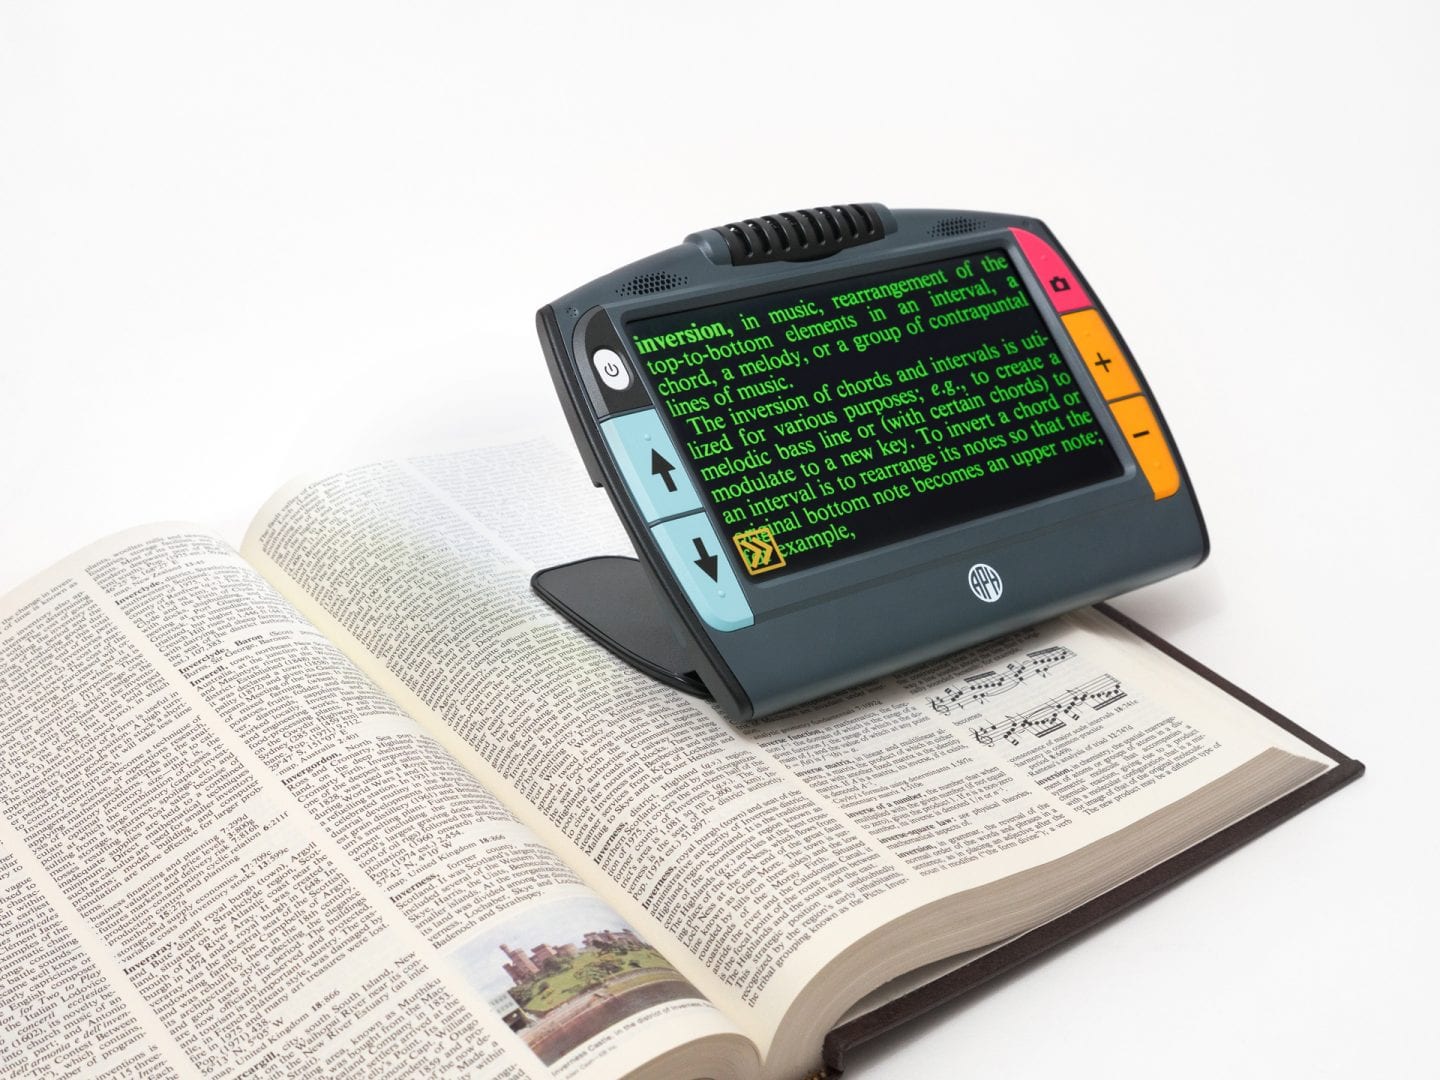
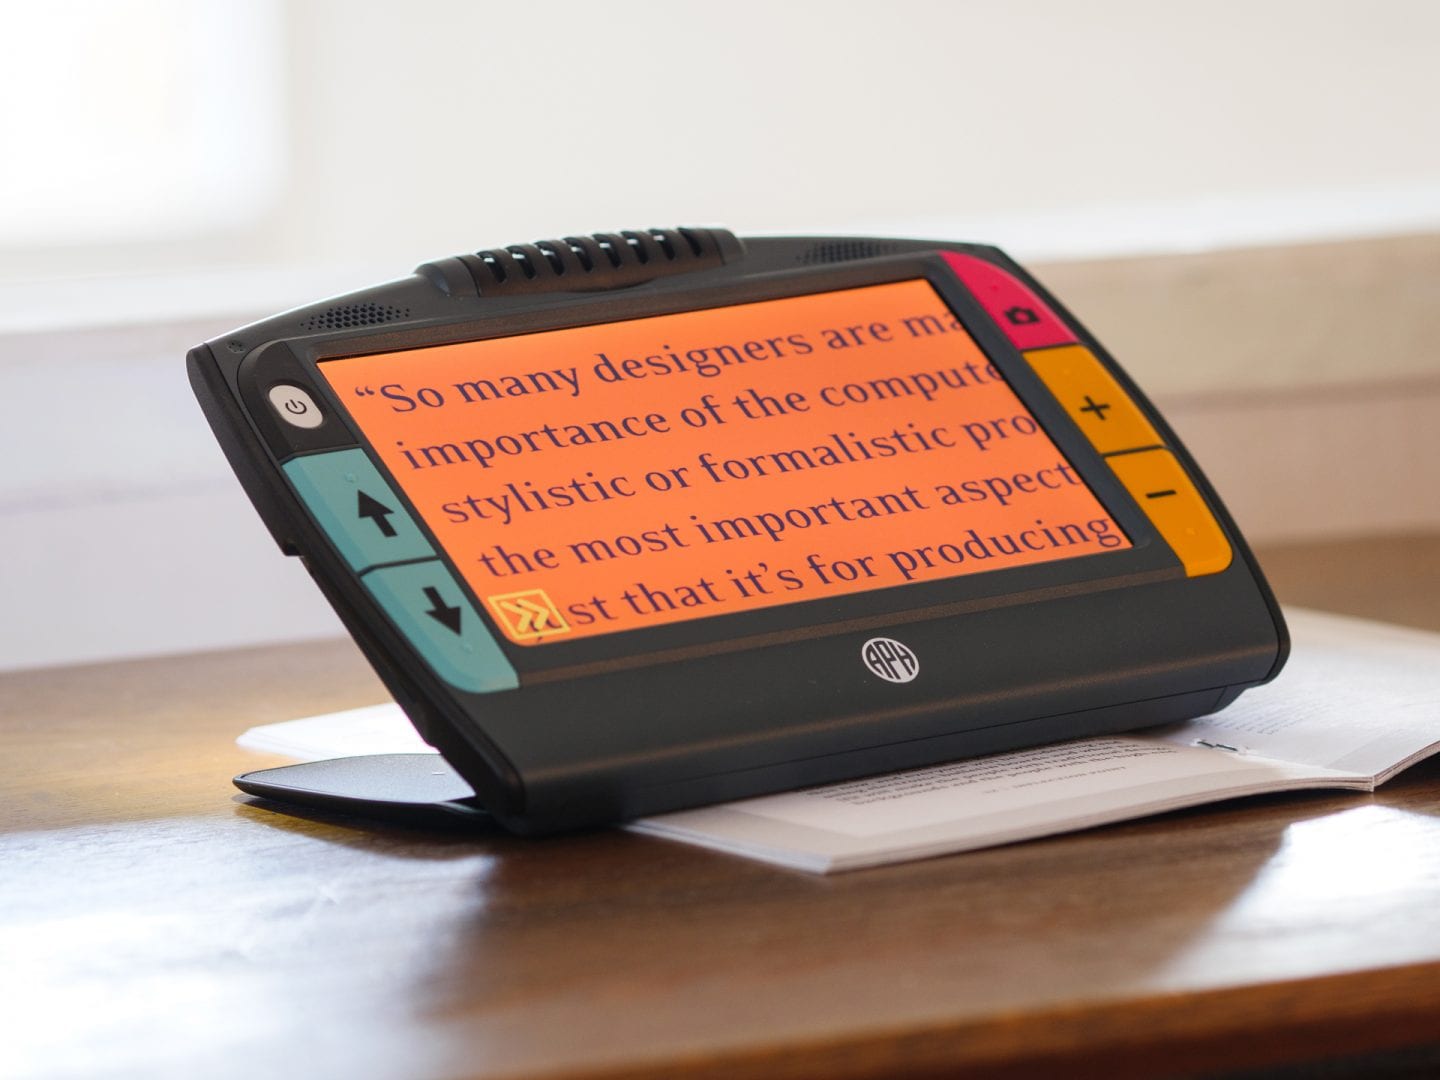
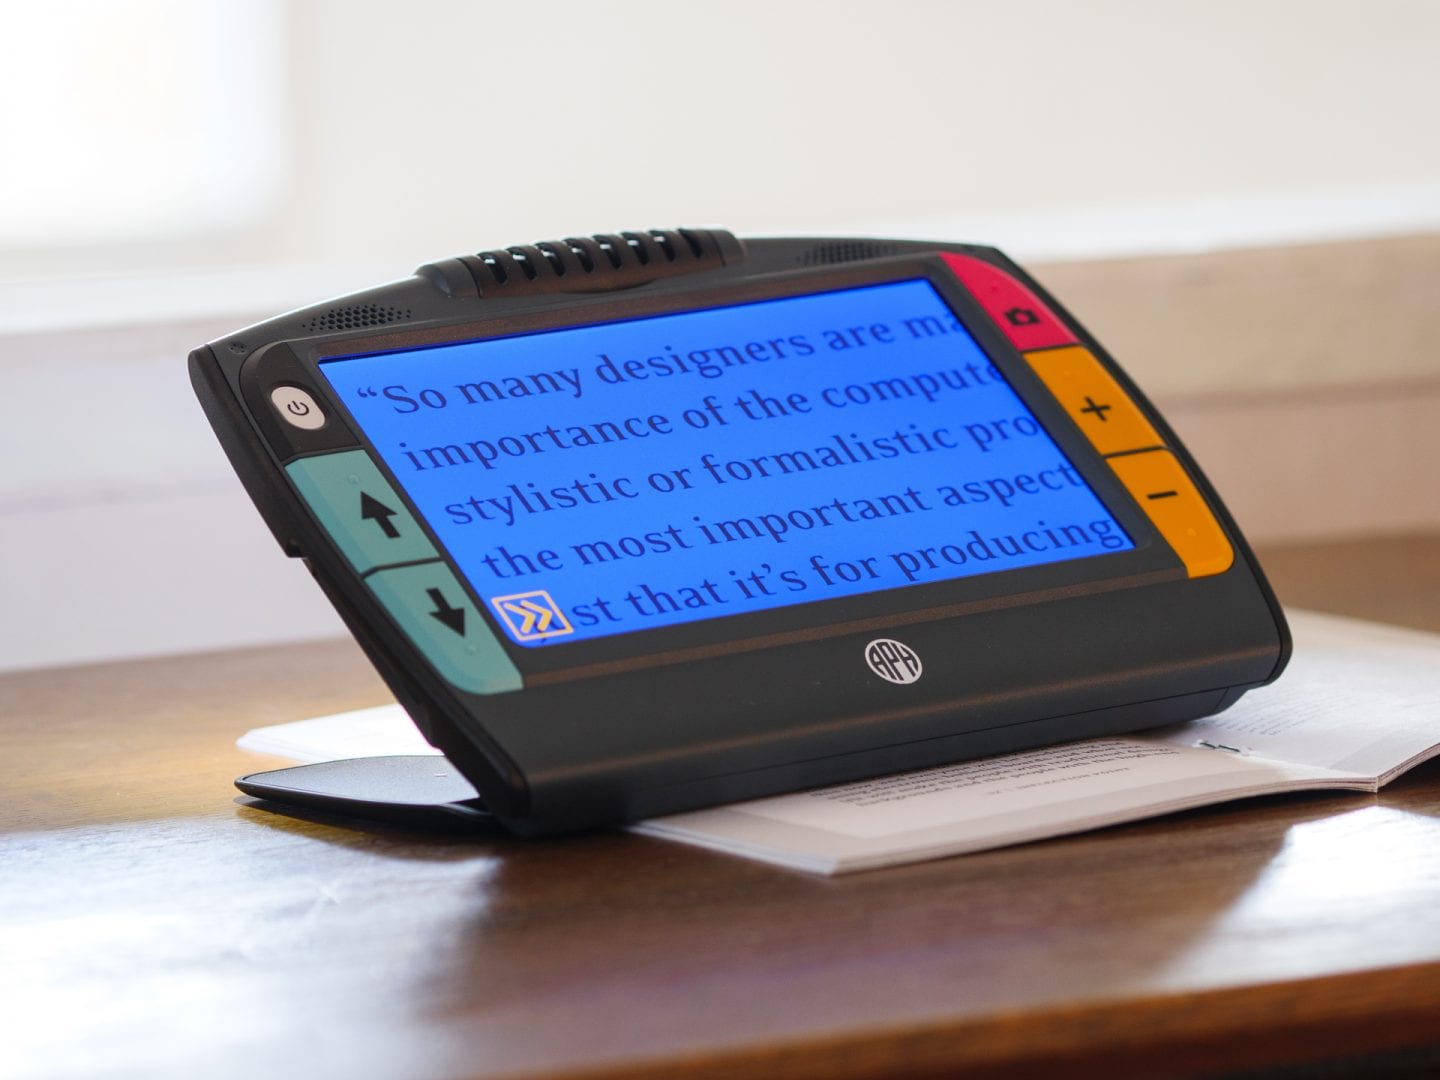
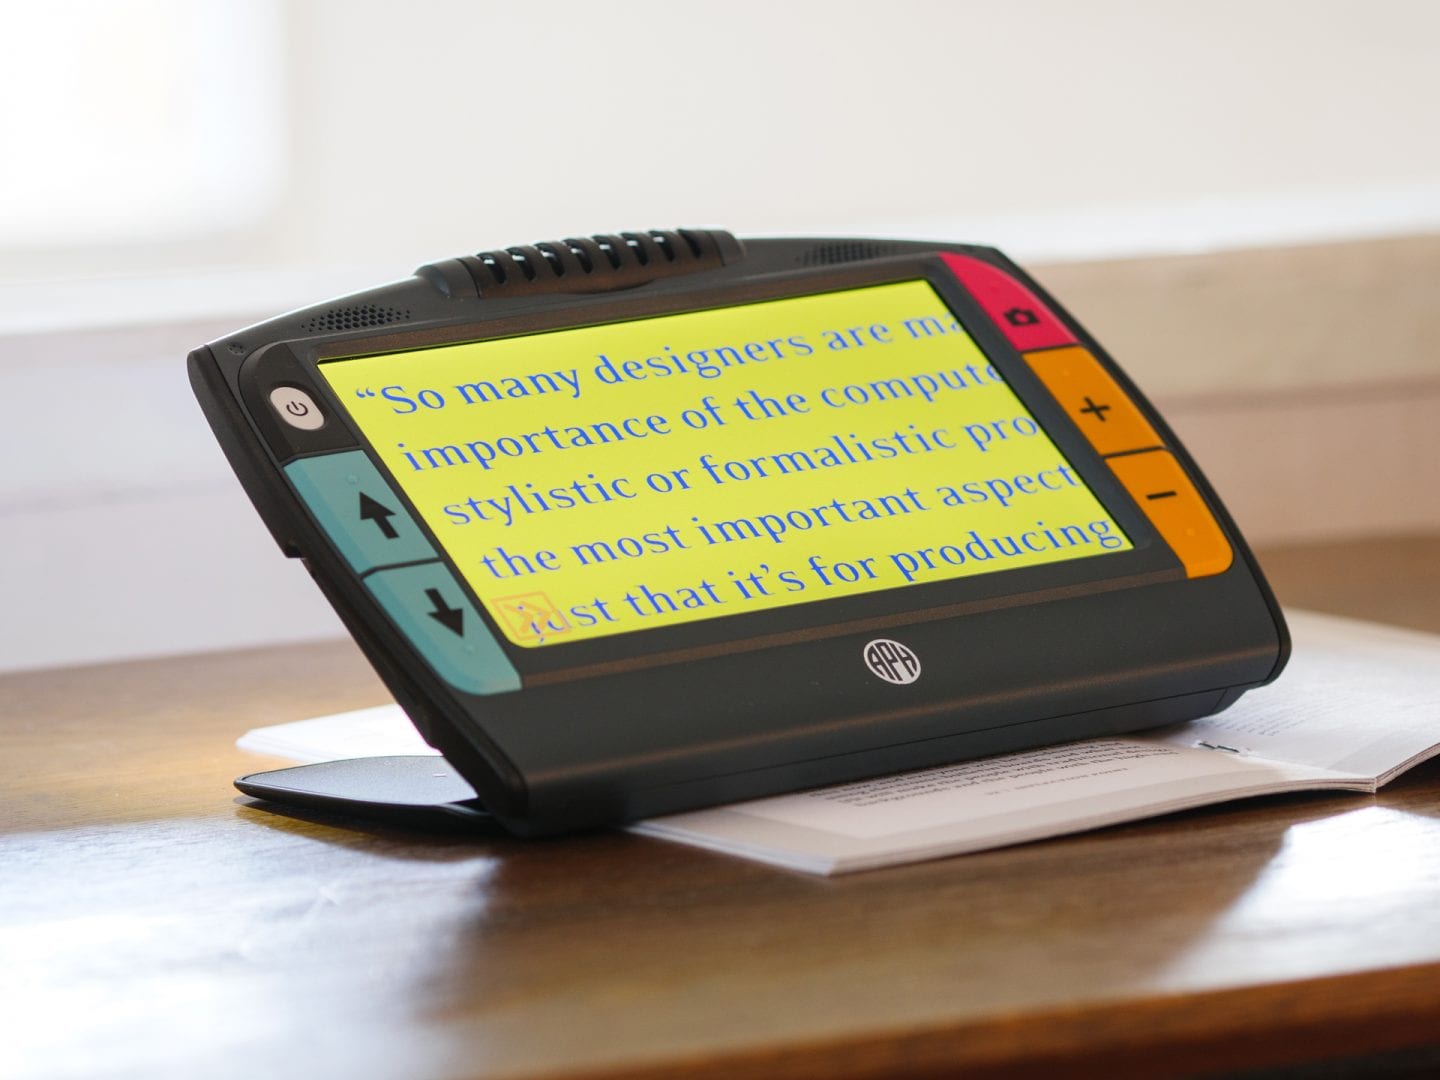
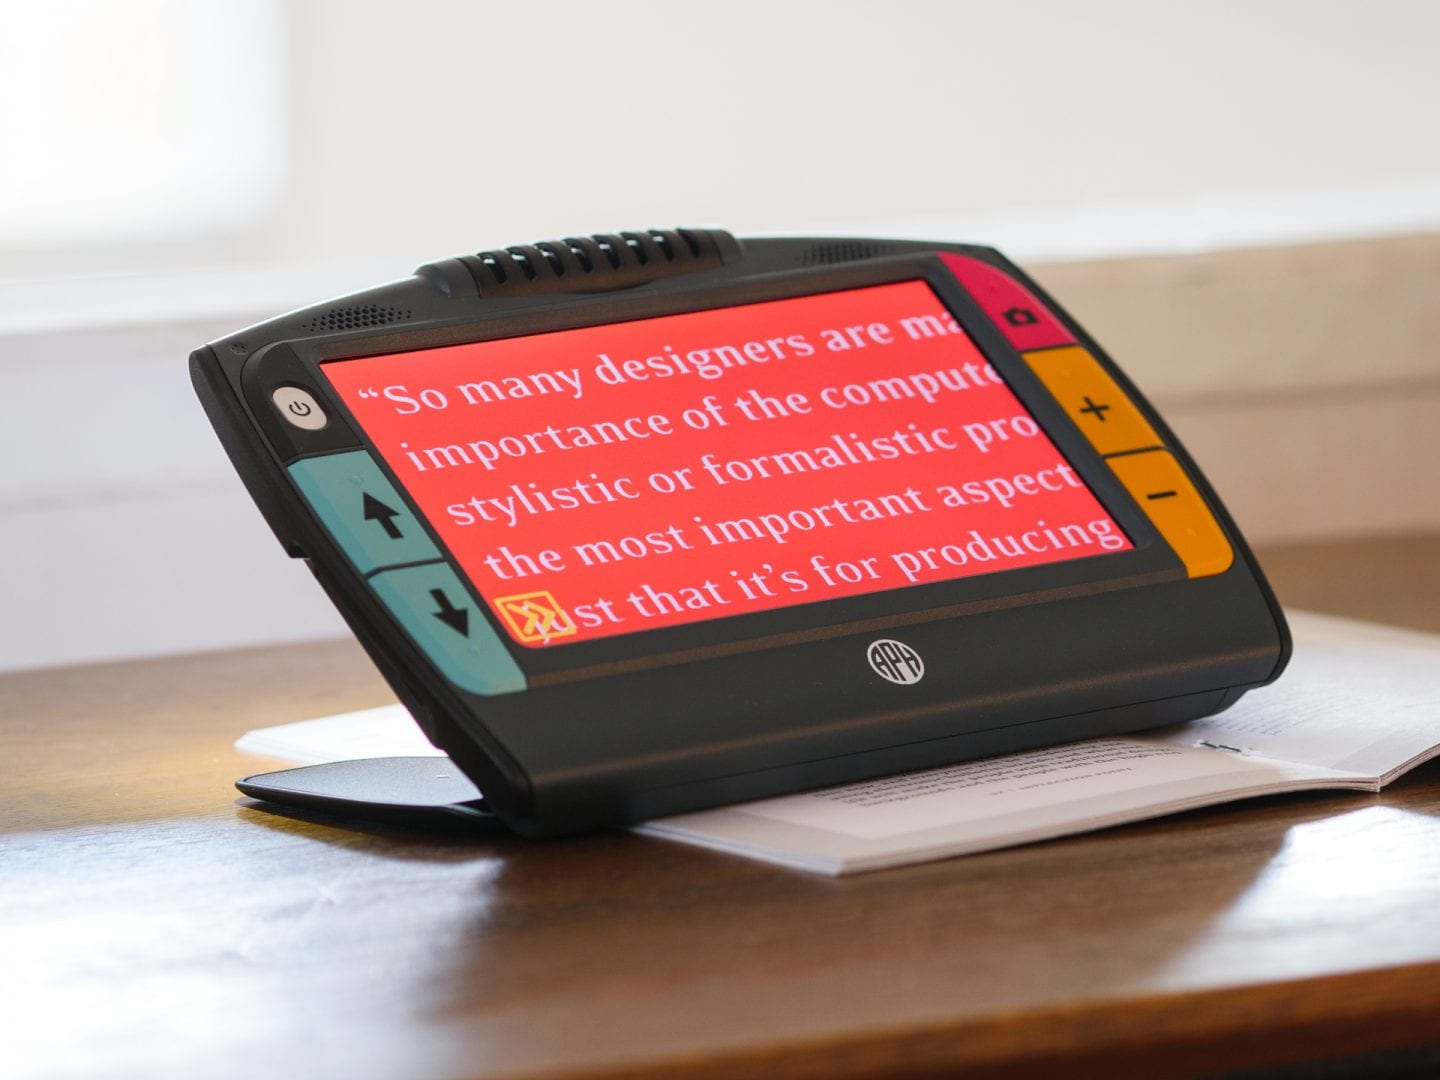
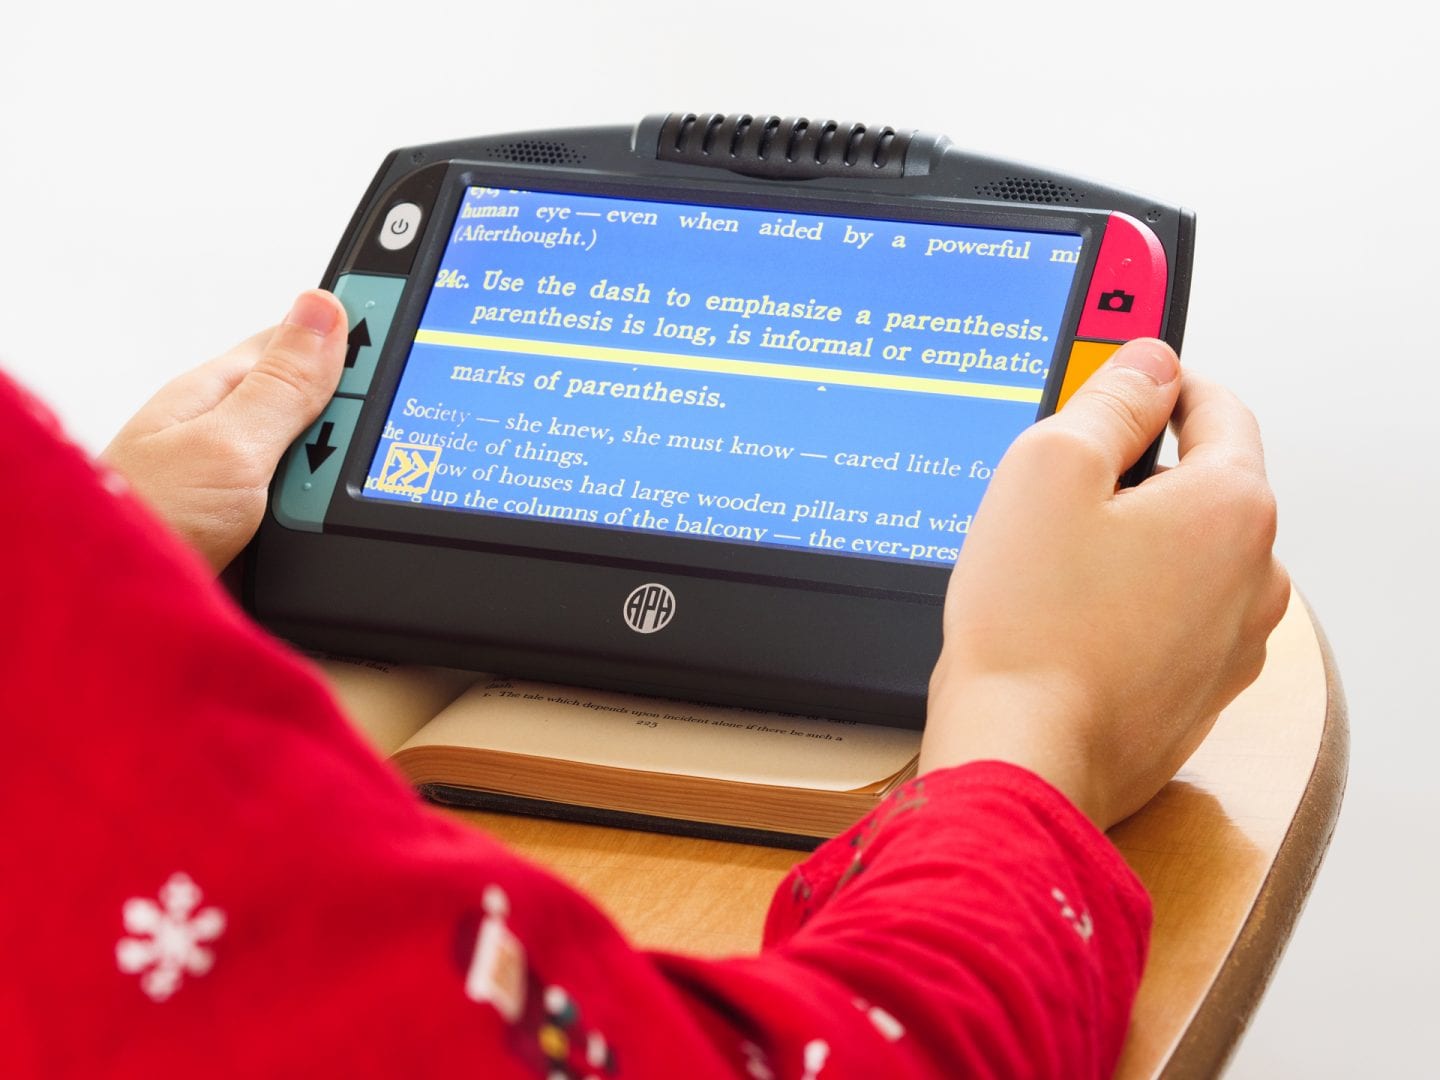
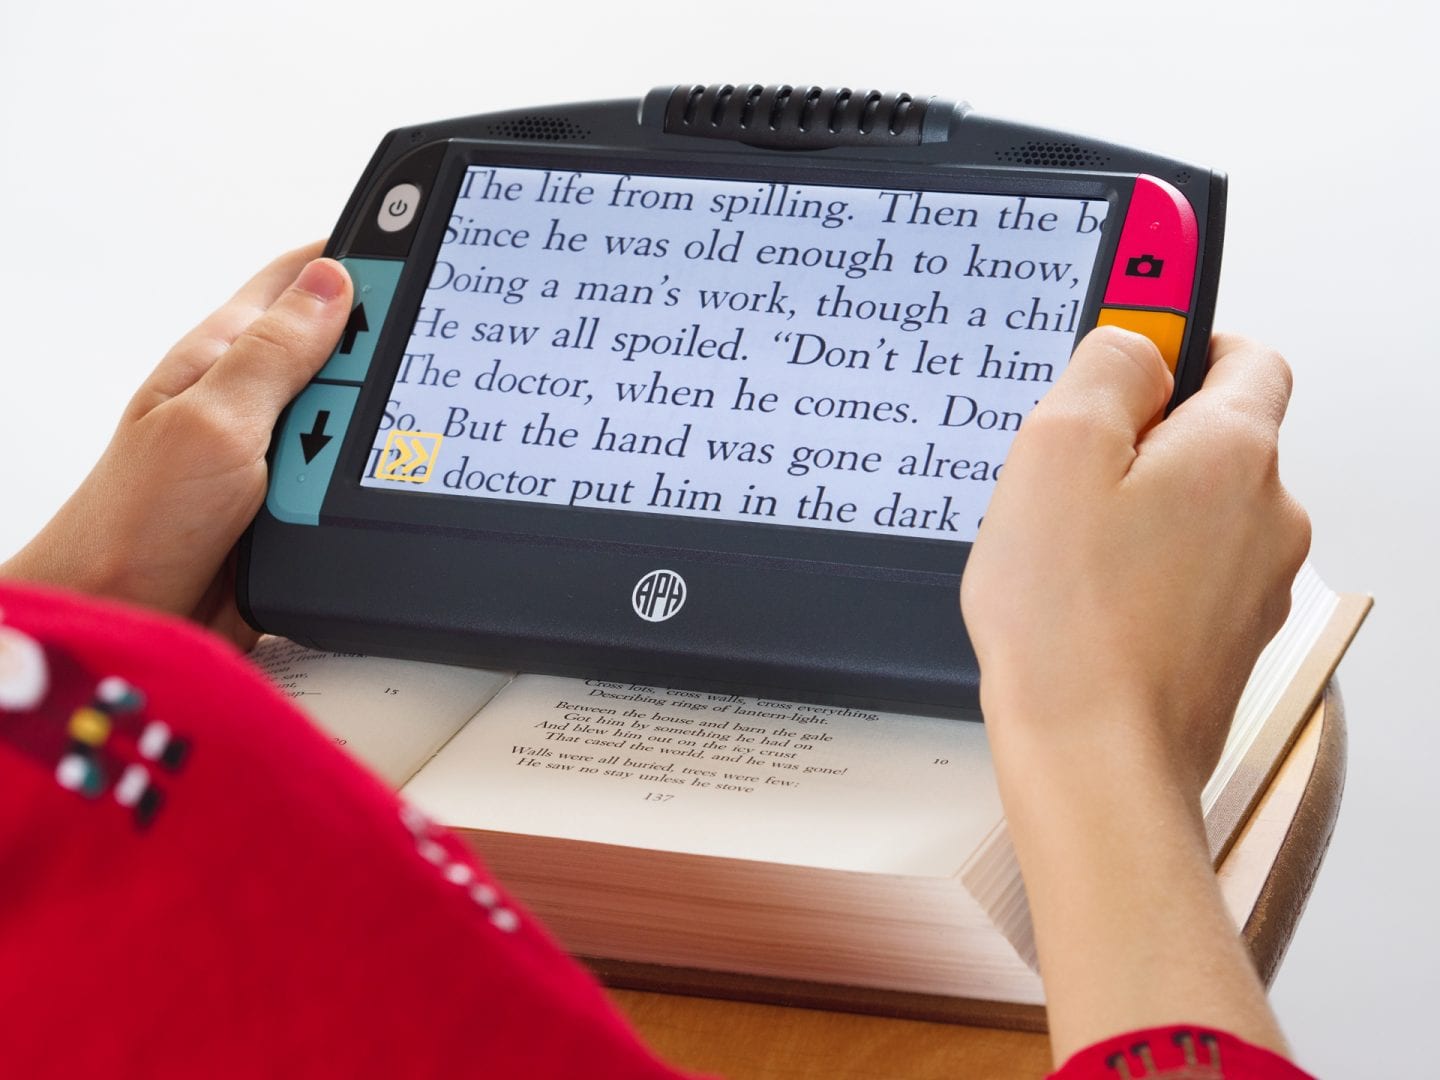
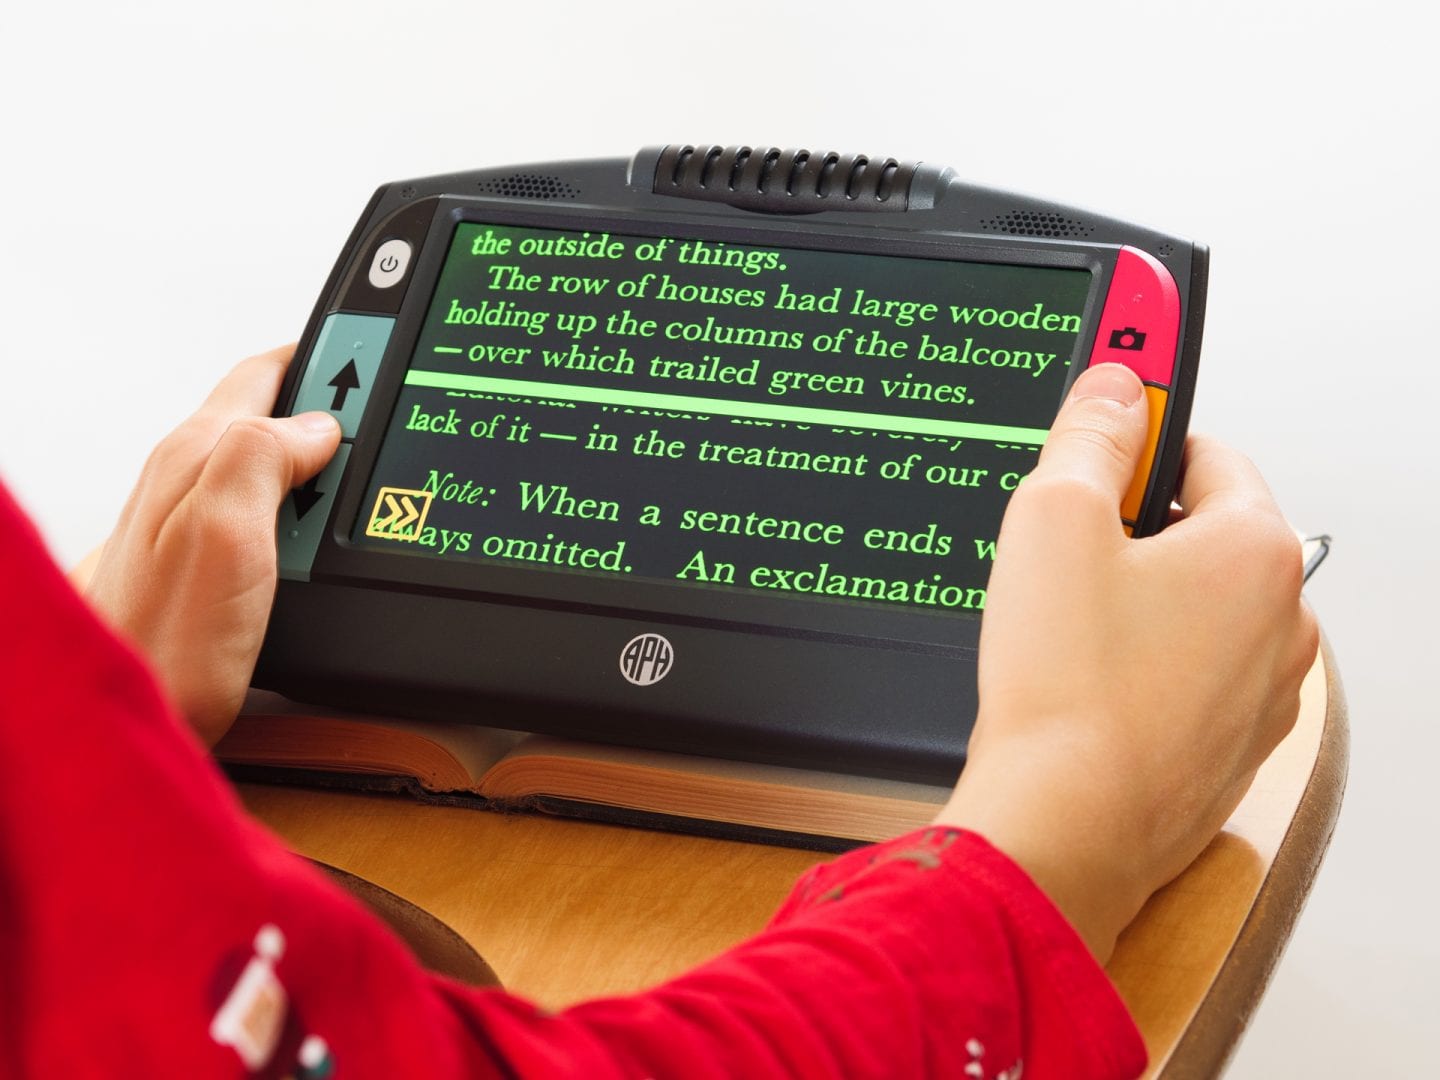
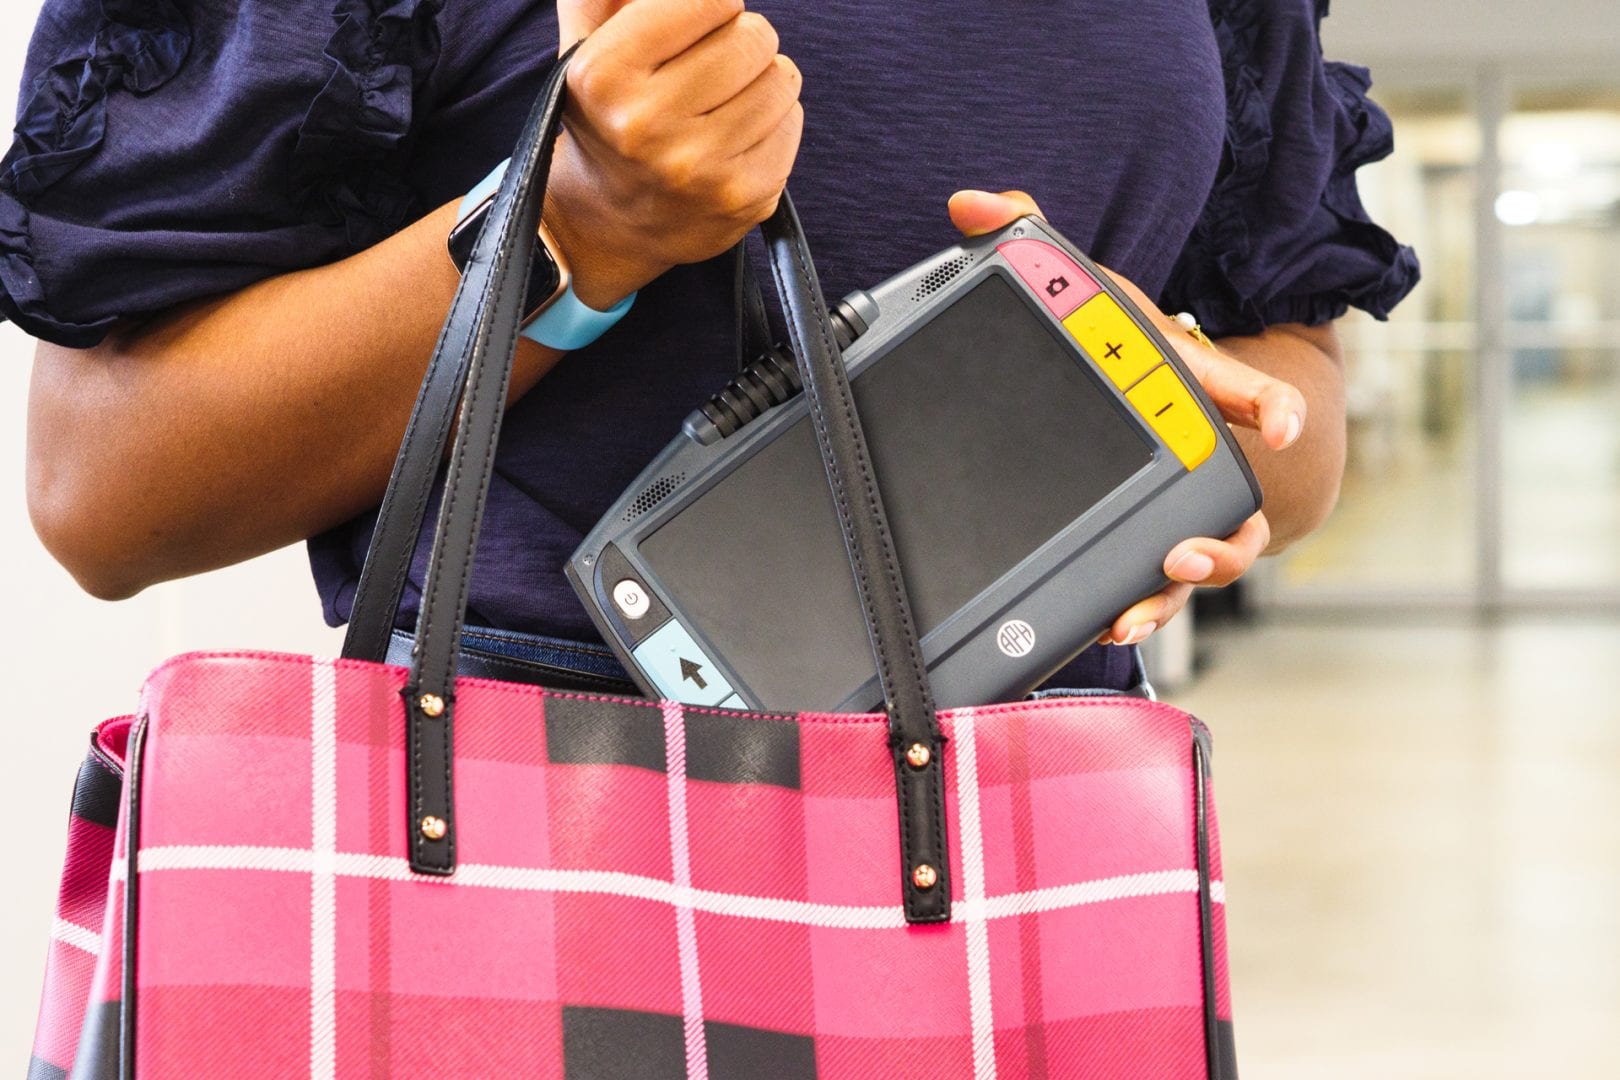
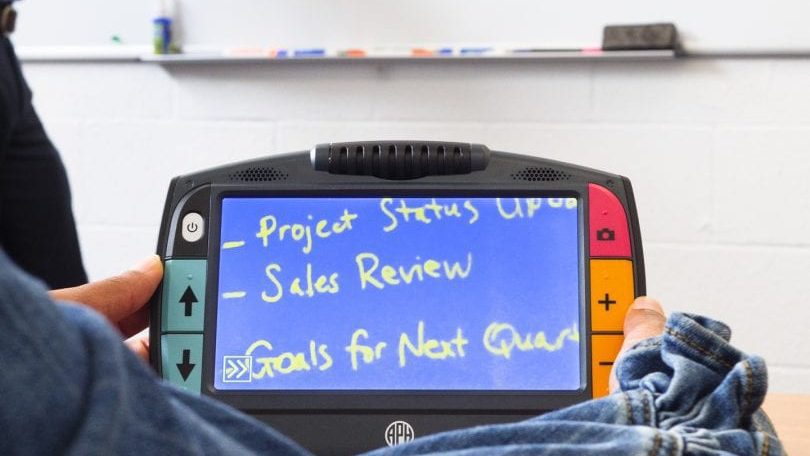
Designed to accommodate the needs of students and adults with low vision, Juno is a great magnifying solution for use during work and recreational activities. Juno can capture and process multiple pages of printed text using Optical Character Recognition (OCR). Users can either read the text on Juno’s 7-inch LCD screen with 2x-30x magnification and 24 high-contrast color modes, or have it read aloud to them using text-to-speech (TTS).
Juno offers a barrel camera that rotates 180 degrees to support five camera modes – promoting independence, learning, and continuing the hobbies that bring joy to everyday life:
Self-view: complete grooming tasks.
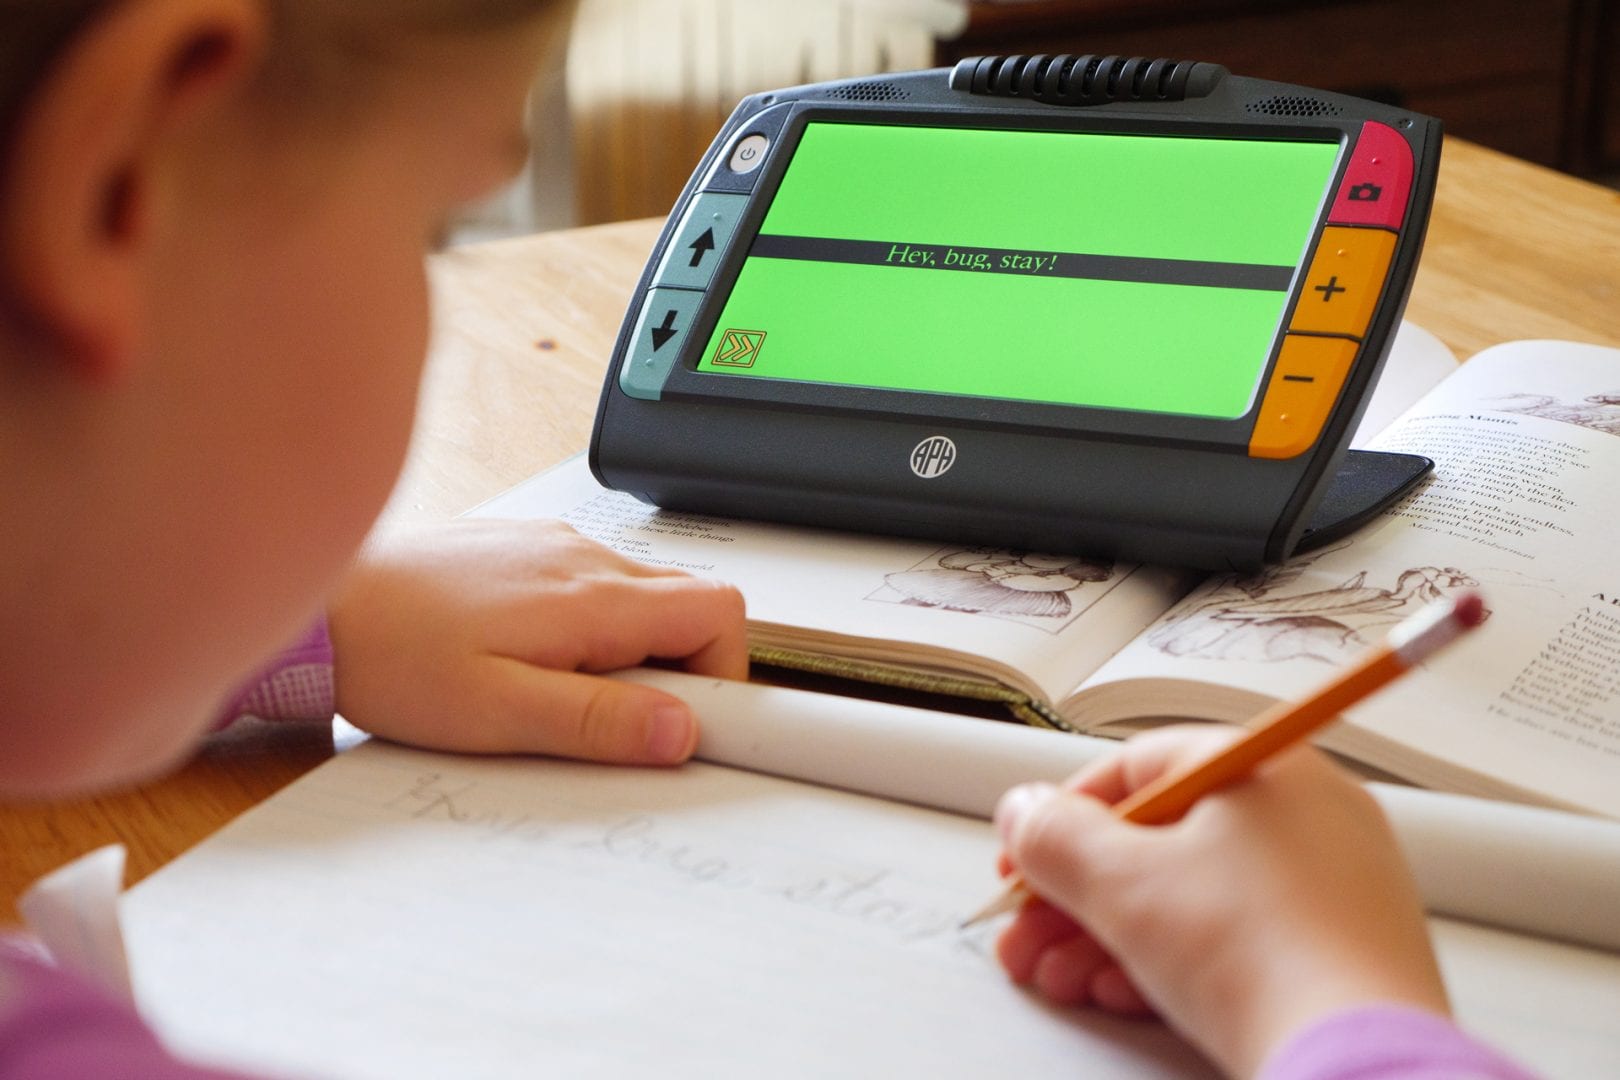
Reading-view: view documents like books and homework assignments.
Distance-view: read a bulletin board, white board, or poster.
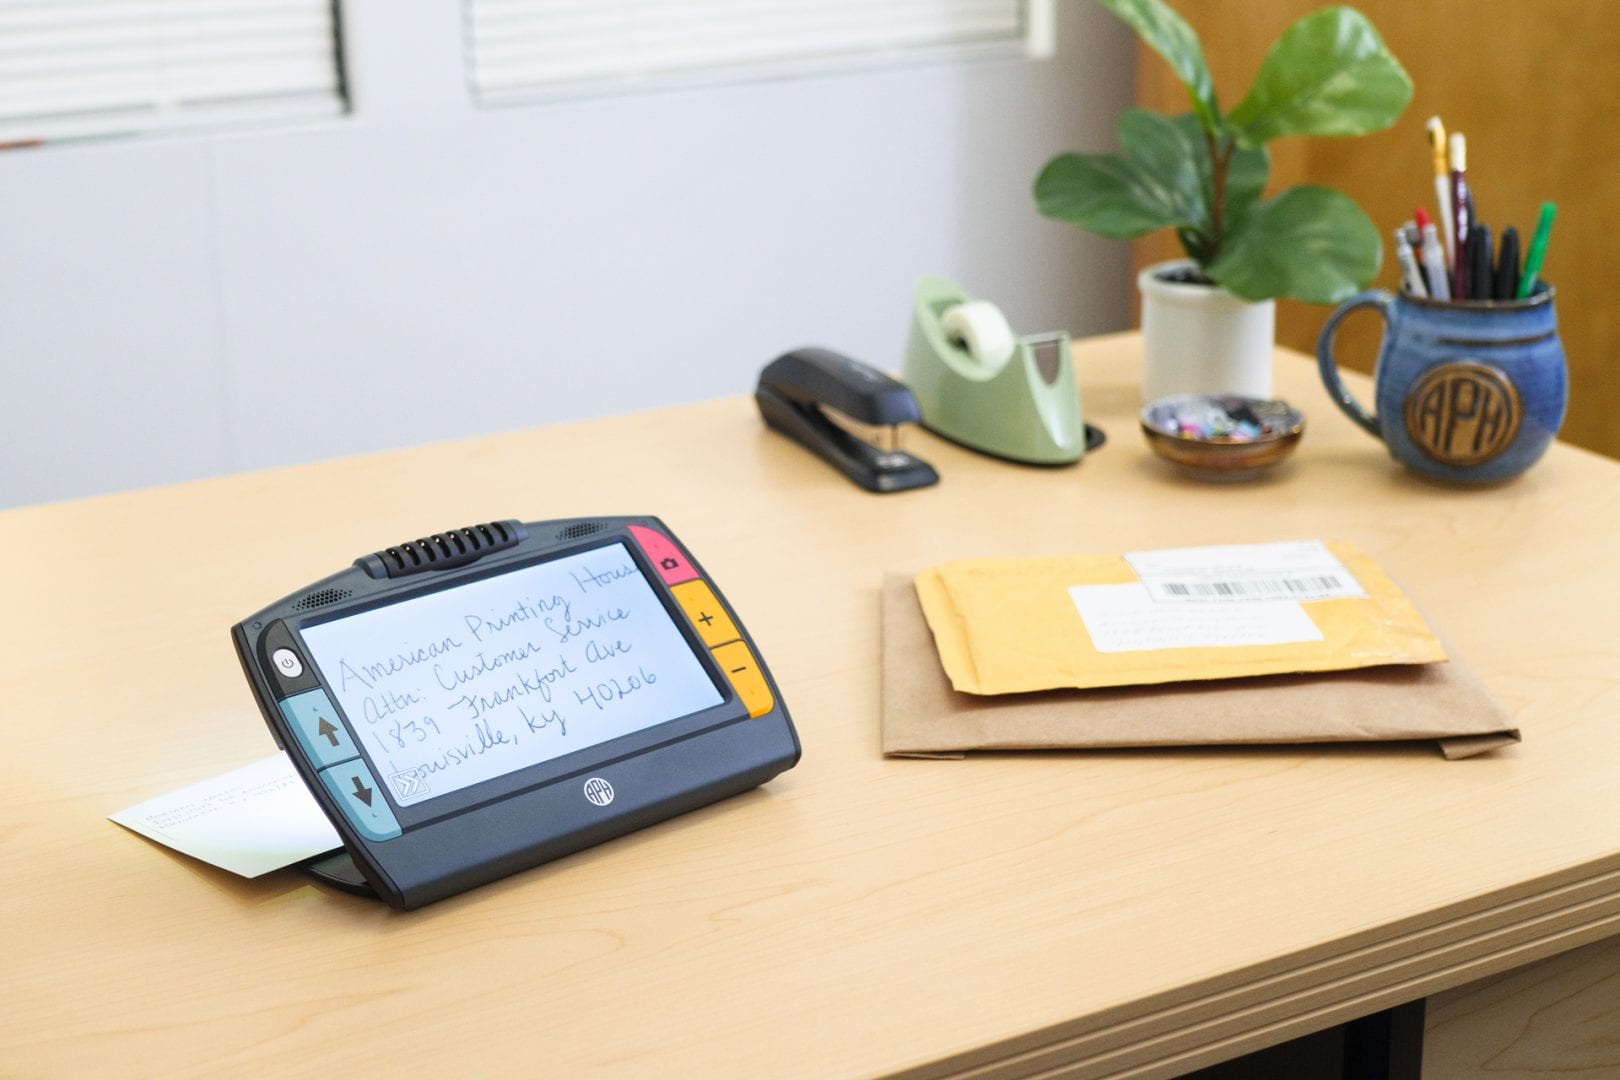
Writing-view: fill out a form, sign your name, write a check, or complete a worksheet.
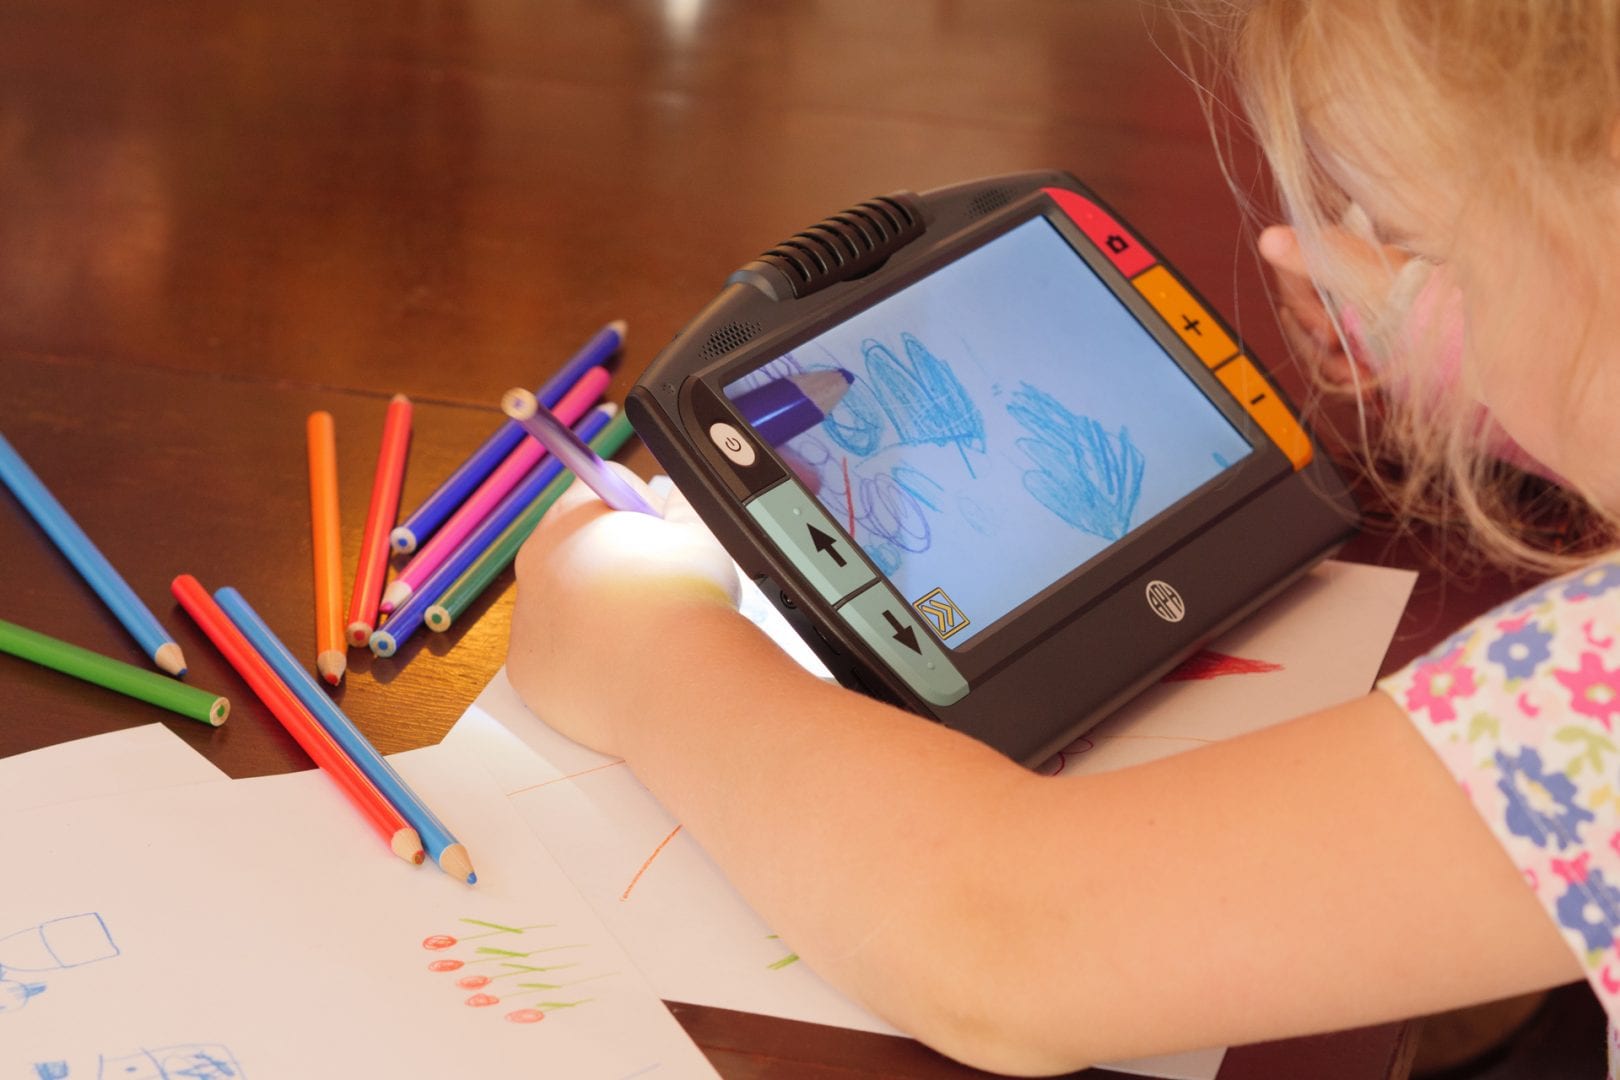
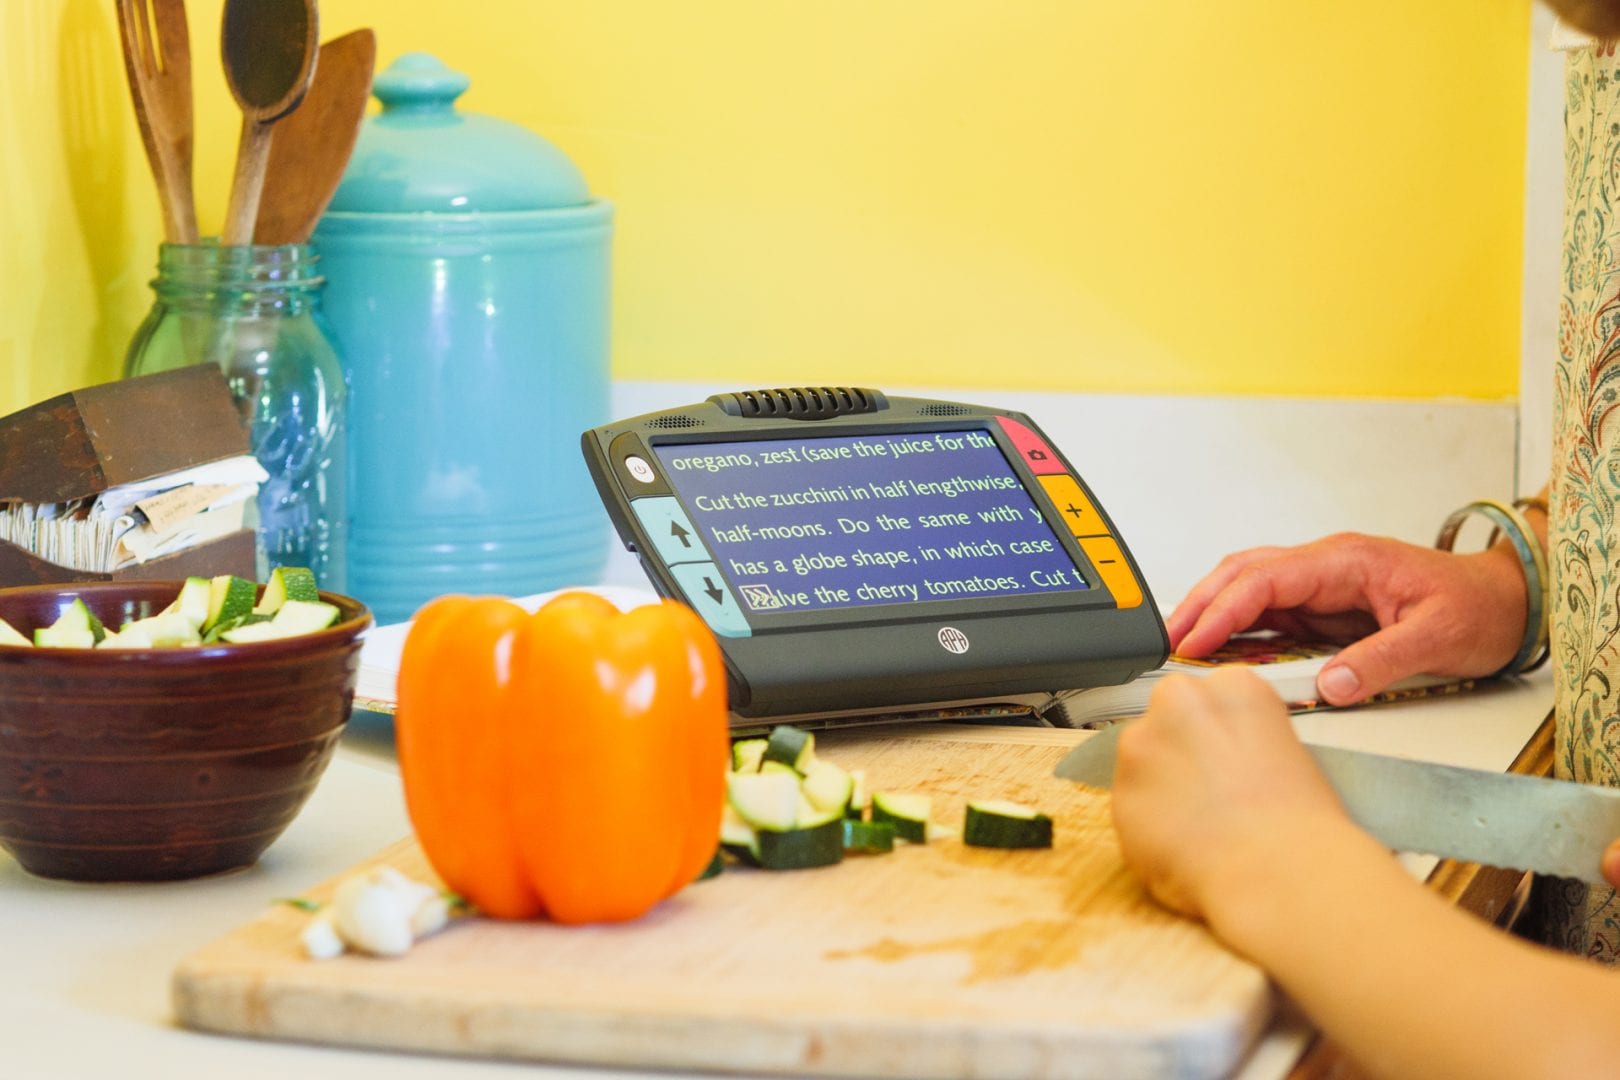
Hobby-view: sew, knit, paint/color a picture, or view your favorite recipe.
Note: Update Juno with the latest software and firmware! To begin, you will download the latest Juno software onto a USB-C flash drive from the Manuals & Downloads section below. Unzip the file. The same flash drive can be used to update multiple Juno devices. The Update Device screen will guide you through the update process. If your computer has only USB-A ports, we recommend using the following USB-C to USB-A flash drive. To perform the update, firstly ensure your battery charge is at least 50%, but a full charge is ideal. Next, tap the Restore button, then tap the Main Menu button. You can access the latest update file at this download link.
Teacher Settings to access exam mode - Lock out certain features to use Juno during an exam.
Capture multiple pages and page navigation
Three reading views - snapshot mode shows full screen capture, teleprompter mode shows text in paragraph form, and tickertape mode shows one line of text at a time.
Zones - With zones, the text is separated by highlighted and numbered boxes to help users jump to different sections in a document or article.
Line and mask feature
Audio tags to name files, making it easier to locate in file manager on Juno
Teachers can name files on the computer and transfer them to Juno’s file manager for students to locate reading assignments in class, or read later to complete homework.
4 GB of storage
The ability to transfer files from a computer and flash drive via USB-C port
Supported files - JPEG, PDF, docx, txt, and more.
Juno magnifier
Padded carrying case with strap
Power supply
USB3.0 type C charger and cable
HDMI cable
Quick Start Guide
User Guide
Screen cleaning cloth
“This is probably the most feature-rich handheld magnifier I have ever seen. The quality of the near magnification is very good, which in my opinion, is the most important function of this device. I really appreciate the different modes available, and I found the OCR to be very accurate, even on older scanned PDFs, which is very important in a school setting.”
“Very portable; quick on and off in standby mode; talking menus were helpful. I also like that it was very similar to using a tablet with a touch screen. I think the reading lines are a great option to help with tracking and keeping your place. Also, the reading options were nice for different views to display text.”
“[I] liked the tactile dot on buttons, the sound, the double press to select, the tutorial in the User Guide, and the announced color settings.”
“All the features worked well. I like how it will speak the buttons for new users; that could save the trainer LOTS of hassle with teaching clients.”
“Very portable and easy to use out of the box for the most basic features.”
Does Juno come with a case?
Yes, a zippered padded carrying case with shoulder strap.
Will Juno go into Standby mode?
Yes. Press the white Power button briefly to put Juno in standby mode. The screen darkens and the processor is put in a lower power state. After five minutes of inactivity, Juno automatically goes into standby mode. Press the Power button to wake up the device. You can adjust the amount of time before Juno goes to sleep by going to the Settings Menu, User Settings then go to Standby Time to set the duration.
Will Juno power down automatically?
No. To power down Juno, press the Power button until you hear tones signaling shutdown and the screen goes dark (about 10 seconds). Juno never powers down automatically. To save your battery charge, consider powering down Juno. However, Juno takes approximately 30 seconds to start up after being powered down. Juno wakes up from standby much more quickly.
What are the different camera positions for the rotating camera on Juno?
Reading
You should lay the document you want to read flat on the desk. Open the stand and place the legs on top of the document. The camera should point straight down. You will need to move Juno over the document as you read it because the visible text is only about the size of a business card.
Text Recognition
The best way to freeze or capture text is to close the stand and hold the device flat with the screen up. The camera automatically rotates 90 degrees so it is pointing down. Hold Juno over a document to get the best page magnification for printed material. To capture an 8.5-inch by 11-inch page, lift Juno approximately 8 inches above the document.
Distance or spot-viewing
To view something at a distance, such as a whiteboard, open the stand and rotate the camera so that it is parallel with the stand. The camera can view at a distance of about 15 feet. With the reading stand closed, point the camera at what you want to view. Press the yellow Zoom In/Out buttons to increase or decrease magnification, and then press the red Capture button to take a picture of the image on the screen.
This is ideal for viewing labels, price tags, receipts, business cards, and more. Press the Capture button again to return to the Live view.
Handwriting or hobby
You can write by opening the stand and rotating the camera so it is pointed down about 45 degrees. You place paper behind the device, then write on it while watching yourself write on the screen. If you enable focus lock, by pressing the focus lock button found on the bottom right button bar, the camera focuses on the paper instead of your hand. You can work on hobbies that require fine motor skills.
Self-view
To view yourself, position the device so you are looking at the screen. The stand can be open or closed. Rotate the camera until it faces you and you can see yourself on Juno’s screen
How do you enable or disable menu speech?
You can control the way Juno displays and announces its menus and other screen elements through Menu Settings. To display Menu Settings:
Tap the Restore button , then tap the Main Menu button .
Tap the Settings icon to display the Settings menu.
Tap the Menu Settings icon to display the Menu Settings screen, which has four options:
Talking Menus
Select Juno Voice
Dark/Light Color Theme
Font Size
Talking Menus
The Talking Menus screen controls whether Juno announces your system location, such as the name of the menu currently displayed or icon that you tapped. It also announces the hardware buttons that you press as you navigate
In the Talking Menus screen, move the slider right to ON to have Juno announce button names and other user interface controls as you tap them.
If the volume is muted or turned down, then you will not hear the menu voice. The Talking Menus is on by default.
Voice Selection
Select the voice used when Talking Menu is on. This voice announces your current location as you move around Juno.
To display the Select Juno Voice screen:
Tap the Restore button , then tap the Main Menu button .
Tap the Settings icon , then tap the Menu Settings icon to display the Menu Settings screen.
Tap the Voice Selection icon to display the Select Juno Voice screen.
Select the voice that Juno will use to speak the menu and button names. Only English is available.
Disabling or turning menu speech OFF will also disable hardware button feedback, when you press the buttons on Juno. It is useful to have menus and buttons spoken aloud until you become familiar with Juno’s User Interface.
How do you perform OCR?
Juno can capture a still image of a document and process the printed words using optical character recognition (OCR). Juno can store approximately 600 images. You can then either read the text or have it read aloud to you (text-to-speech or TTS). The voice selected when Juno was set up is used as the reading voice until you change it. The reading voice can be different than the voice that narrates as you move around Juno. For example, you can have Juno read in French if you are studying that language.
Capturing a Page
You can capture a page and use text recognition to either read the page yourself or have Juno read it to you.
To capture a page and use text recognition:
In live camera view, frame the image of the page on the screen.
Press the red Capture button . A Camera icon is displayed while the image is captured. When complete, the snapshot image is displayed.
Tap the Restore button to display the button bars.
Tap the Recognize Text button to scan the document.
To listen to the text from the beginning, tap the Play button . For other options, tap the Restore button :
To discard the file and return to Live view, tap the Close button .
To toggle between viewing modes tap the Viewing Mode icon .
To save the file, tap the Save button .
Can you capture multipage documents on Juno?
Yes. For a multipage document, it is much faster to scan all the pages before using text recognition. Saving each page and scanning them individually is unnecessary and time consuming. You must capture the pages in order because you cannot reorder the pages after they are scanned.
To capture multiple pages and use text recognition:
In live camera view, frame the image of the page on the screen.
Press the red Capture button . A Camera icon is displayed while the image is captured. When the capture is complete, the snapshot image is displayed.
Tap the Restore button to display the button bars.
Tap the Save button . The Save? screen is displayed.
Tap Add another page? to indicate that you want to create a multipage document.
Tap the Next button to return to Live view. Buttons are displayed across the bottom of the screen: Previous, Save, Recognize Text, and Lights.
Frame your next page and press the red Capture button to capture the next page. Repeat this step until you have captured all the pages in your document. If you are dissatisfied with a capture, tap the Previous button to discard it.
Can you navigate through multipage documents?
Yes. To quickly move around a multipage document, you can tap a page number in the scrolling list or tap one of the following icons:
Start of Document displays the first page of the document.
Previous Page displays the previous page in the sequence of scanned pages.
Furthest Viewed displays the furthest location that you have previously viewed. If you have a 10 page document and have viewed the first five pages, for example, then you would jump to page 5.
Next Page displays the next page in the sequence of scanned pages.
What file types are supported on Juno?
Juno supports the following file types: JPEG, PNG, BMP, WEBP, TXT, RTF, PDF, and DOCX. Files that comprise a book are not listed; only the book name is displayed as a VCB (Vispero Compressed Book) file.
How do you save files on Juno?
An image is saved with the current magnification and color settings just as displayed on the screen. However, you also can change the magnification level or color mode while viewing a frozen or saved image. To save an image:
Press the red Capture button to take a picture. A Camera icon is displayed, followed by a snapshot of the image you just captured.
Tap the Restore button to display the button bars. To the right of the image are the following buttons:
Cancel and return to the Live view
Recognize the text
Save the image
Tap the Save button to save the image. The Add another page? screen is displayed.
Tap No to save a single image. The Save Image? screen is displayed.
Tap Yes to save the image as the default save type then tap OK to confirm. The Record Audio Tag? screen is displayed.
How do I record audio tags to identify saved files?
Audio tags are critical to identifying your saved files on Juno. You can apply an audio tag to any file that you save or import. However, a file exported to a USB-C flash drive or copied to a computer will not keep its audio tag, so the audio tag is only useful on Juno.
You can add an audio tag when you save a captured image or text file, or later, when you open a saved file. To apply an audio tag:
After you save or open a file, tap the Record icon .
Clearly speak the file name. Think of a description name for the file that will help you remember its contents later.
Tap the Stop icon . The tag is saved when you tap the Previous button .
Listen to your recording by tapping the Play icon .
How do I transfer files to the computer?
To import files onto Juno:
Place the files(s) you want to import in a folder on your computer. If you have homework to import, for example, then put your homework files in one folder.
Copy the folder of files you want to import onto a USB C flash drive.
Plug the USB-C flash drive into Juno’s USB port.
Tap the Restore button , then tap the Main Menu button .
Tap the File Manager icon to display the Files screen.
Tap the Import/Export button in the lower right corner. The Select Transfer Mode screen is displayed.
Note: The Import/Export button is not displayed until a USB-C flash drive is inserted.
Tap the Import button . The Import From screen displays.
Select the folder that holds the files that you want to import, then tap the Next button . A confirmation message is displayed.
Tap Yes. The files in the folder are imported and available from the Files screen.
To export all files on Juno:
Place a flash drive into the USB-C port on Juno.
Tap the Restore button , then tap the Main Menu button .
Tap the File Manager icon to display the Files screen.
Tap the Transfer button in the lower right corner of the screen. The Select Transfer Mode screen is displayed.
Tap the Export button . The Export To screen is displayed.
Select a drive. If you have a USB hub, you may have several choices. A second Export To screen is displayed.
Tap the folder (directory) on the USB-C flash drive where you want to export the files, then tap the Next button . A confirmation message is displayed.
Tap YES, then remove the USB-C drive from Juno and plug it into a USB port on your computer. If the port is not Type C, you will need a USB adapter.
Use File Explorer to copy the files from the USB-C drive onto your computer.
Copying Juno Files onto a Computer
Using a USB-C cable, you can copy files from Juno onto a computer by following these steps:
Attach the USB cable to ports on Juno and on your computer.
Open File Explorer, where Juno is shown as a media device.
Go to /Juno/Internal Shared Storage/DCIM/Juno/. Copy the files in the three folders (subdirectories) and paste them onto your computer:
The Documents folder contains TXT, RTF, PDF, and DOCX files.
The Images folder contains BMP, JPEG, PNG, and WebP files.
The JunoDoc folder contains VCB (multipage book) files. The files that comprise the VCB are also in the Documents and Images folders. You can back up these Vispero compressed book files on a computer, but no PC or web applications read this file type. However, this is an easy method for transferring books between Juno devices.
Copying Files from a Computer onto Juno
Using a USB-C cable, you can copy supported file types onto Juno by following these steps:
Attach the USB cable to Juno and your computer.
Open File Explorer and ccopy the files you want to place on Juno.
Juno is shown as a media device in File Explorer. Go to Juno/Internal Shared Storage/DCIM/Juno/ and paste the copied files into the proper folder (subdirectory):
Place TXT, RTF, PDF, and DOCX files in the Documents folder.
Place BMP, JPEG, PNG, and WebP files in the Images folder.
The copied files are now available from the Files screen on Juno.
Note: If the files are not copied to the correct folder, then they will not display on the Files screen.
Do I need to use a USB-C flash drive?
To update Juno, you must purchase a USB-C flash drive (formatted FAT32). This flash drive can also be used to import/export files from Juno to a computer and download log files. To give you more flexibility, we recommend purchasing a dual flash drive that offers both USB-A and USB-C. Also, a USB-C adapter can be used with a USB-A flash drive.
How long will the battery last?
Battery: Lithium-ion rechargeable 3.6v battery with 6500mAh capacity, approximately three hours of typical use, charges in approximately three hours when Juno is connected via the USB C cable to an outlet using the AC power adapter
The default language is English. You can set only one language and one voice at a time for reading. If you were studying French, for example, then you would change the reading language to French. When you were ready to switch back to homework in English, you would need to reset the language to English.
To change the reading language:
Tap the Restore button to display the button bars, then tap the Main Menu button
Tap the Settings icon to display the Settings menu.
Tap the Reading Settings icon to display the Reading Settings menu.
Tap the Reading Language icon to display the Select Reading Language screen.
Swipe up or down to move through the list, then select the language used for text recognition: English (default), French, German, Spanish, or Chinese. You can only select one language at a time.
Tap the Next button .
Tap the voice used to read documents, which is separate from the menu voice. If you do not select a voice, the default is the device voice. After choosing a voice, Juno responds in that voice and the language you selected
Can Juno connect to external devices?
Connections:
HDMI mini
USB-C
Audio jack
To view video on a larger screen, you can connect the device to an HDTV or monitor using the HDMI mini cable. When you connect, you see the same thing on Juno and on the display of the device.
You can charge Juno by connecting the USB-C cable to an outlet using the power adapter. You can also charge Juno by connecting it to a computer using the USB-C cable, although Juno charges more slowly this way. Connecting to a computer also enables you to copy Juno files onto the computer. You cannot use the USB-C cable to display Juno screens on a computer. You can also use a USB-C flash drive to import/export files onto Juno.
The audio jack is available for connecting the same type of headphones that you would use with a cell phone. You can use headphones to listen to system narration or use the headphone’s microphone to name your saved files.
What are the different viewing modes and highlighting options on Juno?
The Viewing Modes screen provides toggle buttons for the viewing mode and highlighting.
Tap the Restore button to display the button bars, then tap the Main Menu button .
Tap the Settings icon to display the Settings menu.
Tap the Reading Settings icon to display the Reading Settings menu.
Tap the Viewing Modes icon to display the Viewing Modes screen.
Toggle the top right button to select the default viewing mode.
Snapshot mode shows a full screen of text without high contrast color.
Teleprompter mode shows text in paragraph form using high contrast color.
Tickertape mode shows one line of text at a time using high contrast color.
Tap the bottom right button to toggle the way text is emphasized as it is read aloud:
Boxed
Underlined
How do Zones work in a document?
If you open a DOCX or PDF file, or if you open a captured file with recognized text, then the first viewing mode is Zones . With zones, the text is separated by highlighted and numbered boxes to help you navigate around the document.
You can choose where you want to begin reading by tapping a zone. If you tap the Play button rather than tapping a zone, then narration starts at the beginning of the document.
In Zone view, the captured image is in full color, but selecting a color mode changes the zone highlighting and numbering.
How do you use Juno in exam mode?
The Teacher Settings screen provides instructors with time-limited controls designed to allow a student to use the Juno magnifier during a testing situation. It is recommended that you change the settings to lock Juno before an exam, then return them to their default values after the exam. You can set the amount of time that Juno is locked or you can manually unlock it to return the values to their previous settings.
The Teacher Settings screen is available only through the button combination found in the steps below. No feedback is provided during the process to make it more difficult for students to deduce. To lock Juno before giving an exam:
Tap the Restore button , then tap the Main Menu button .
Tap the Settings icon , then tap the System Settings icon to display the System Settings screen.
Tap the battery indicator in the upper left corner seven times in less than three seconds.
Press the red Capture button . The Teacher Settings screen is displayed.
Note: If Juno is locked, you are prompted to enter a previously set lock code. When you display this screen and enter the pin code, restrictions are automatically disabled.
Press the Previous button to exit the menu without applying any settings.
Scroll through this screen and tap the settings to reflect how you want Juno to work while a student takes an exam:
Tap the Next button . The Enter Lock Code screen is displayed. A pin code is required to activate exam settings.
Swipe up or down in each column to select a five-digit code that you will use to enable and disable the restrictions.
Tap the Lock button . Juno is locked for the time specified in the Expire Settings field.
Note: To unlock Juno before the time has expired, see the next procedure. Teacher settings are retained so you can easily lock Juno the next time.
Unlock Juno
If you need to reset the default values sooner than the time allotted in the Expire Settings field, then you will need to unlock Juno by activating the Teacher Settings screen by pressing the special key combination listed above. The Enter Lock Code screen is displayed.
Swipe up or down in each column to select the five-digit code that unlocks this screen, then tap the Unlock button . The Teacher Settings screen is displayed and restrictions are automatically disabled.
How do you update Juno’s software?
Update Juno
Update Juno with the latest software and firmware. You must download the latest Juno software onto a USB-C flash drive to perform this procedure. However, you can use the same flash drive to update multiple Juno devices.
The Update Device screen steps you through the software and firmware update process. This process keeps your system working properly and adds any enhancements to Juno since the last release.
To perform the update:
Ensure you have a minimum of 50 percent battery power. Optimally, have full battery power.
Tap the Restore button , then tap the Main Menu button .
Tap the Information icon to display the About screen (sample data in graphic). Check the App Version number.
On your computer, go to the following URL and note the number of the latest update: https://www.aph.org/product/juno/.
If the latest update is numerically higher than the version on the device, download the update file, which ends in. vhu.
Copy the update to a USB-C flash drive. The update file needs to be placed on the root/top-level directory of the USB drive. Do not place it within any folder.
Insert the USB-C flash drive with the Juno updates into Juno’s USB-C port.
In the System Settings screen tap the Update Juno icon . The Update Device screen is displayed.
Select the .vhu file. After a moment, the UPDATE button is displayed.
Tap the UPDATE button to start the update. The progress of the update is displayed in the middle of the screen.
Note: If you remove the USB drive before the next step, you will exit the update process and return to the System Settings menu .
Read the screen and tap OK to proceed with the update. Do not use Juno during the update process. Juno will restart at least once without any action on your part during the update. The status of the update is displayed.
Note: If you restart the system during an update, the Update Device screen displays each time you restart until the update is complete.
If the update completes successfully, a success message is displayed. Otherwise, a failure notification is displayed and you must repeat this procedure. Tap OK to clear the message.


 to take a picture of the image on the screen.
 , then tap the Main Menu button
  .
. to display the Settings menu.
 to display the Menu Settings screen, which has four options:
 Talking Menus
 Select Juno Voice
 Dark/Light Color Theme
 Font Size
 is displayed while the image is captured. When complete, the snapshot image is displayed.
 to scan the document.
 . For other options, tap the Restore button
  .
. .
. .
. to return to Live view. Buttons are displayed across the bottom of the screen: Previous, Save, Recognize Text, and Lights.
 to discard it.
 displays the first page of the document.
 displays the previous page in the sequence of scanned pages.
 displays the furthest location that you have previously viewed. If you have a 10 page document and have viewed the first five pages, for example, then you would jump to page 5.
 displays the next page in the sequence of scanned pages.
 .
. . The tag is saved when you tap the Previous button
  to display the Files screen.
 in the lower right corner. The Select Transfer Mode screen is displayed.
 . The Import From screen displays.
 . The Export To screen is displayed.
 icon to display the Reading Settings menu.
 to display the Select Reading Language screen.
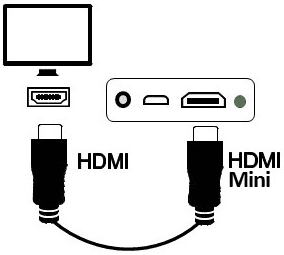
 Snapshot mode shows a full screen of text without high contrast color.
 Teleprompter mode shows text in paragraph form using high contrast color.
 Tickertape mode shows one line of text at a time using high contrast color.
 Boxed
Boxed Underlined
 . With zones, the text is separated by highlighted and numbered boxes to help you navigate around the document.
 to display the System Settings screen.
 . Juno is locked for the time specified in the Expire Settings field.
 . The Teacher Settings screen is displayed and restrictions are automatically disabled.
 to display the About screen (sample data in graphic). Check the App Version number.
 . The Update Device screen is displayed.