The MATT Connect Replacement Android 12 Tablet will upgrade any first-generation MATT Connect to the current MATT Connect V2.1.
Upgrading your operating system to Android 12 will result in the ability to run the latest apps, including the pre-installed APH Android apps. Improvements made to the operating system include enhanced accessibility, a dark theme, increased battery life, and a quicker start up time. Learn more about Android 12 by visiting What’s in Android 12.
We are thrilled to announce three new updates to Prodigi software (version 4.8.1) for use with the Connect 12 and MATT Connect (v2.1 tablets only).
The updates include:
Dictionary application in exam mode: Customize testing sessions by restricting user access to the Dictionary Application in Exam Mode.
2-finger “Return-to-carousel” gesture: Quickly return to the Prodigi Carousel from the Dictionary application with one simple gesture, saving a user’s time and improving productivity.
WPA3 support (personal only): Enjoy enhanced security with support for WPA3-Personal, providing stronger password-based authentication.
Operating System upgrade to Android 12 (Snow Cone)
Prodigi v4.7 – industry leading low vision productivity software
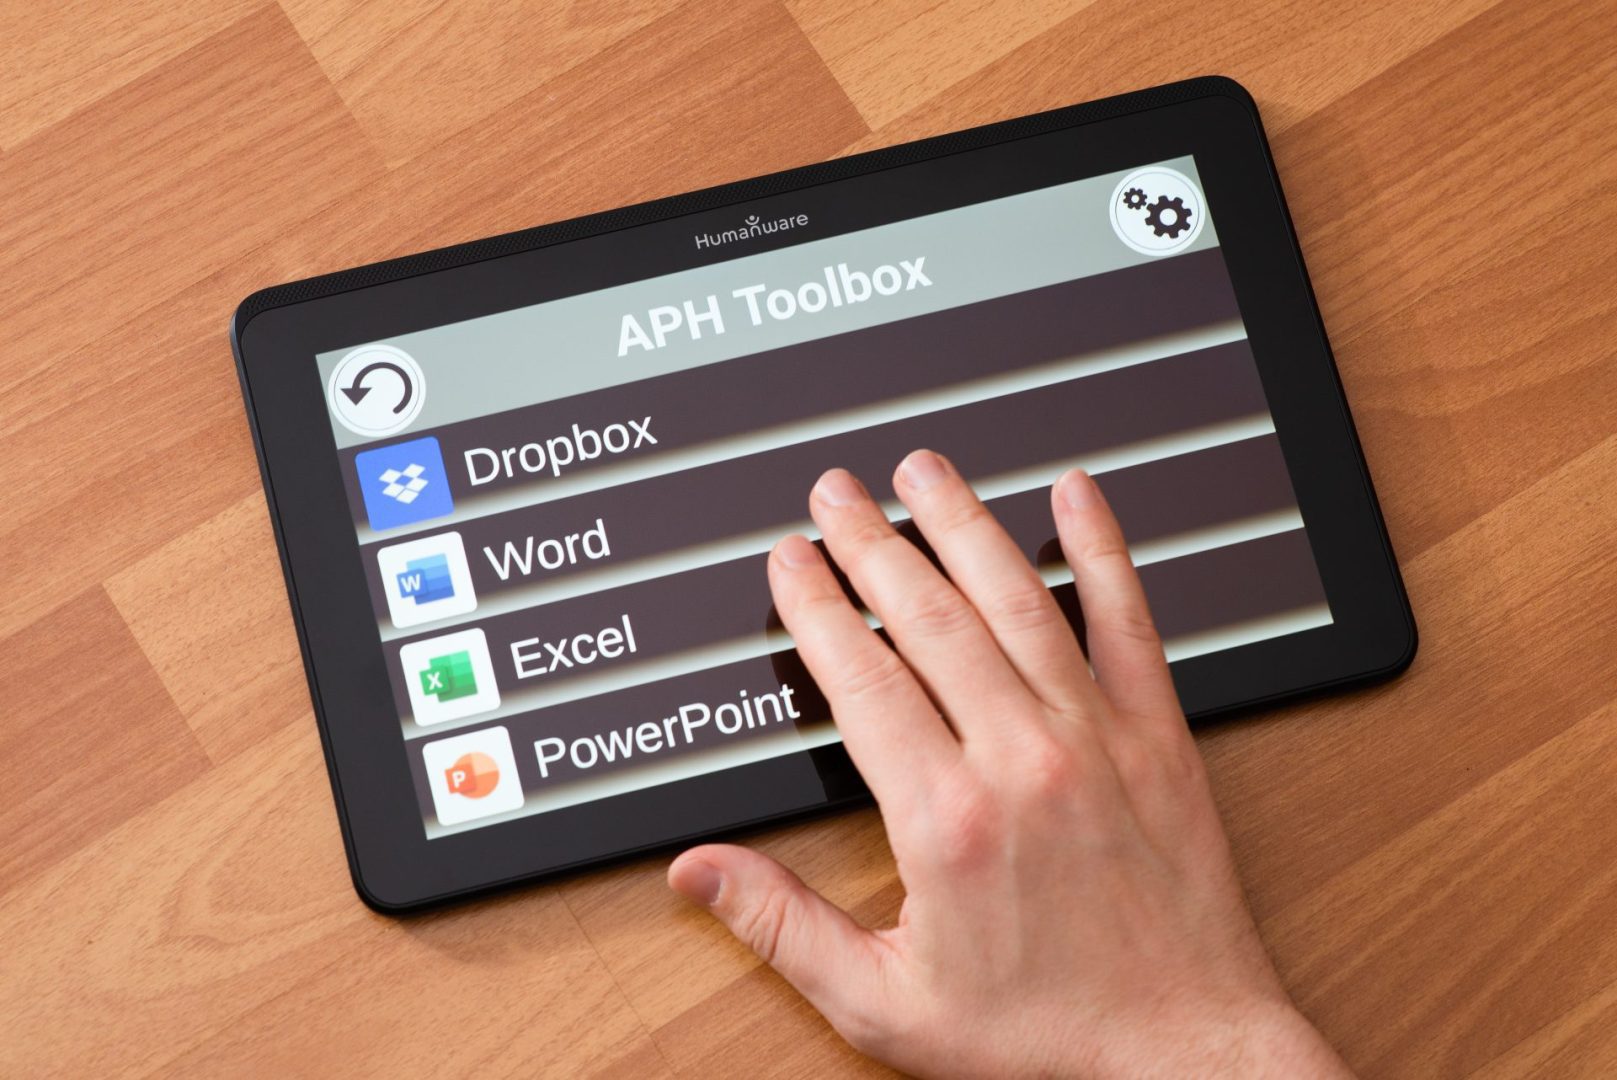
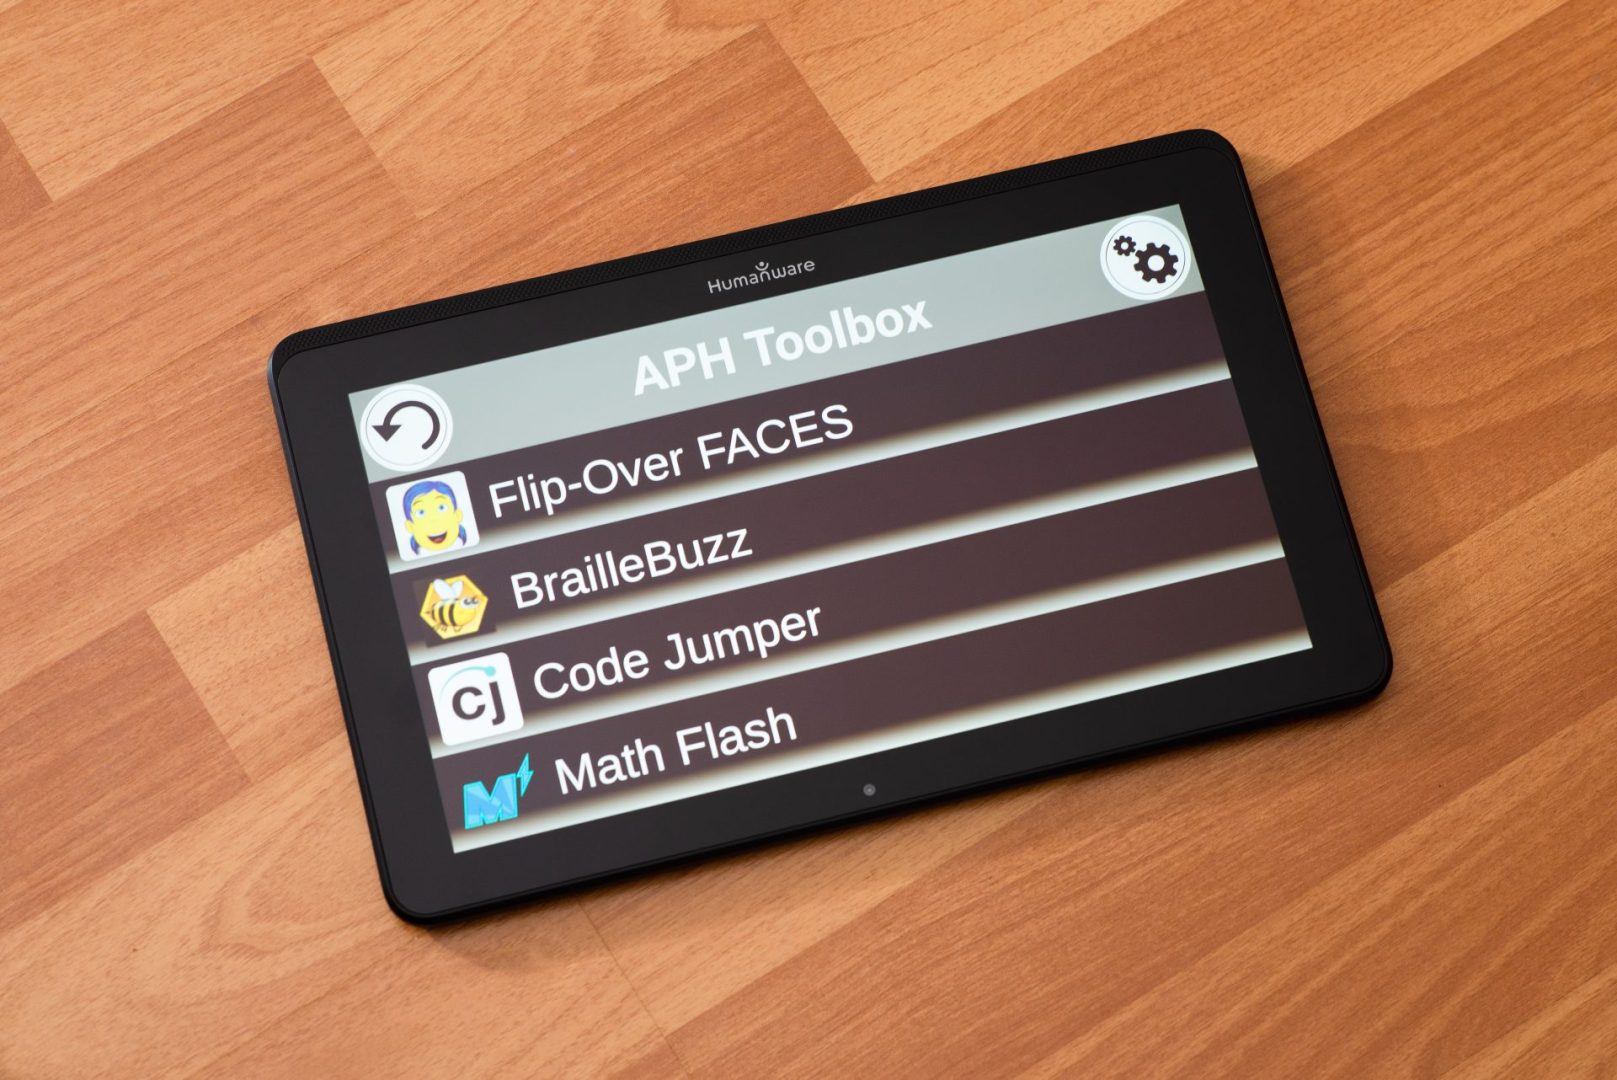
APH Android apps included
Updated Wi-Fi Hardware from previous MATT Connect
Updated Bluetooth Hardware from previous MATT Connect
Pre-installed: Google Suite apps, Dropbox, and several e-book readers
Open Android™ platform provides access to 1,500,000 additional apps
Desmos Calculator plots graphs and solve equations with this scientific calculator
12-inch HD touchscreen
Notes Application quickly creates handwritten or typed notes.
Proxy Connection Support sets up your connection to proxy networks using Prodigi.
New Books Application: Dolphin Easy Reader. This helpful application enables users to enjoy Bookshare and dozens of other international libraries, such as RNIB and CELA, providing access to millions of e-books, digital talking books, newspapers, and magazines from around the world.
Self-View Camera Mode. Provides quick access to the front-facing camera within the Magnifying app for self-grooming, or to snap a quick selfie. This new feature is also coupled with the ability to disable OCR on captures.
Rapid Toggle for users who like shortcuts. Need to access Chrome and Google sheets often? You may now toggle to any application of your choice with only a few swipes across your screen!
Android 12 tablet
Factory Reset Procedures
MATT Connect Tablets (v2 and v2.1)
CRITICALLY IMPORTANT: You must remove Google accounts from your tablet before performing a Factory Reset. Failure to do so may result in your being locked out when you attempt to re-activate the tablet, which requires returning the tablet to HumanWare and is *NOT* covered by warranty.
Before starting, identify your tablet version, then choose the appropriate steps below for your tablet. Identify your version by viewing the serial number on the back of your device. The first four digits of the serial number identify the tablet version:
v2.0: 4001xxxxxxxx
v2.1: 4011xxxxxxxx
Your serial number can also be found in Prodigi -> Settings -> About.
Continue to the instructions for your tablet below.
v2.0 Tablets
A note before starting: You can avoid full factory resets in the future by creating an “Administrative” Google account, followed by student or user accounts. Doing so lets you remove the student/user accounts and create new ones without resetting the tablet. Go to Settings -> Device-Users -> Multiple Users to establish this tablet setup.
Instructions for v2.0 Tablets
Before executing the Factory Reset of the tablet, make sure that any Google accounts that are active on the tablet are removed by going into Settings -> Accounts -> selecting Google -> tap on the three dots on the top right of the screen and choose Remove Account.
Once the account(s) are removed, go back to Settings and tap on Backup & Reset –> Factory data reset -> RESET TABLET -> ERASE EVERYTHING. The tablet will reboot.
Once the tablet is rebooted, follow the tutorial to set up the language, Wi-Fi, and accounts. If a Prodigi update pop-up appears, select Cancel for now.
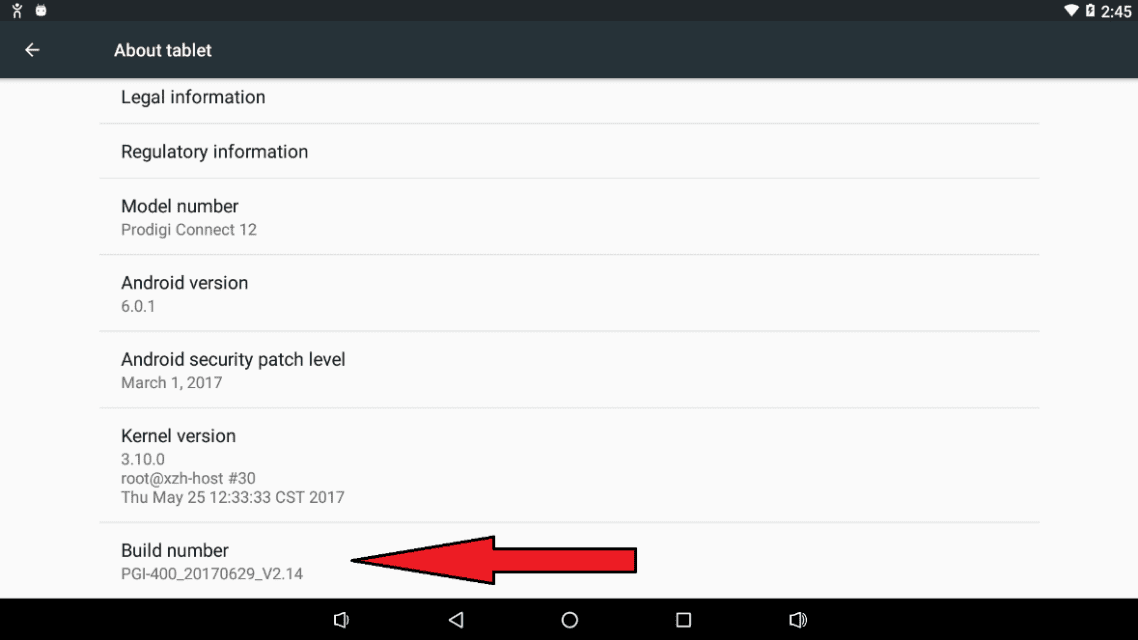
When the setup tutorial is finished, the Developer Options must be activated by going into Settings -> About Tablet -> Click seven (7) times on “Build number” at the bottom of the list.
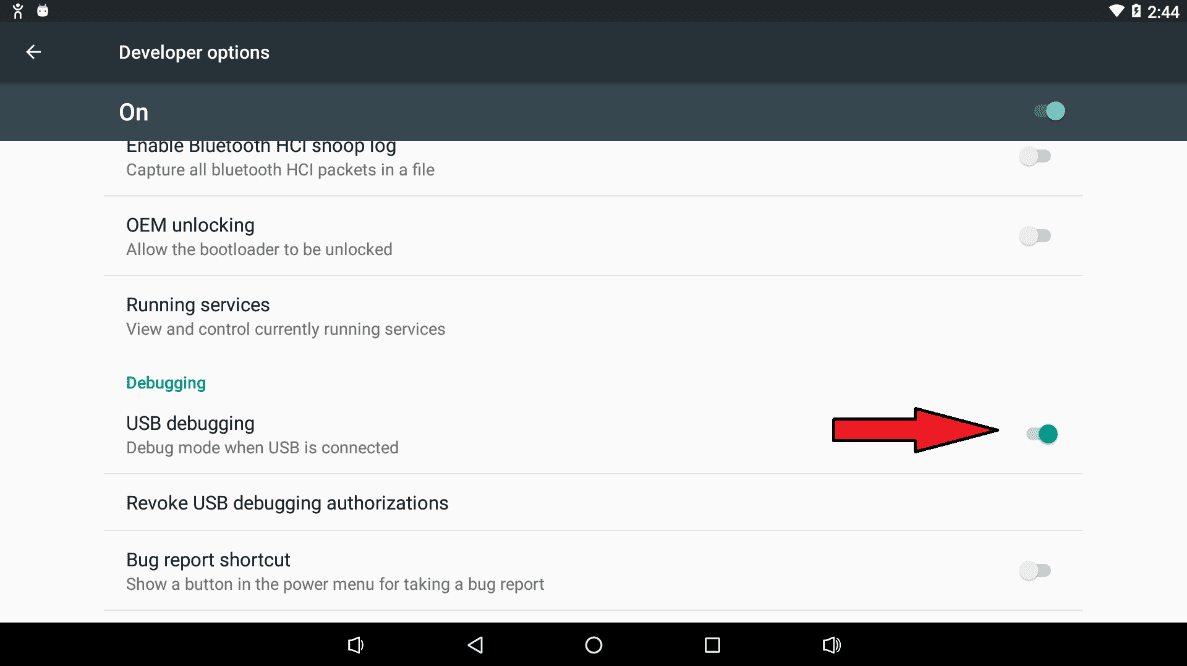
Then go back to Settings, select Developer Options –> Enable USB Debugging, and tap “OK” on the pop-up.
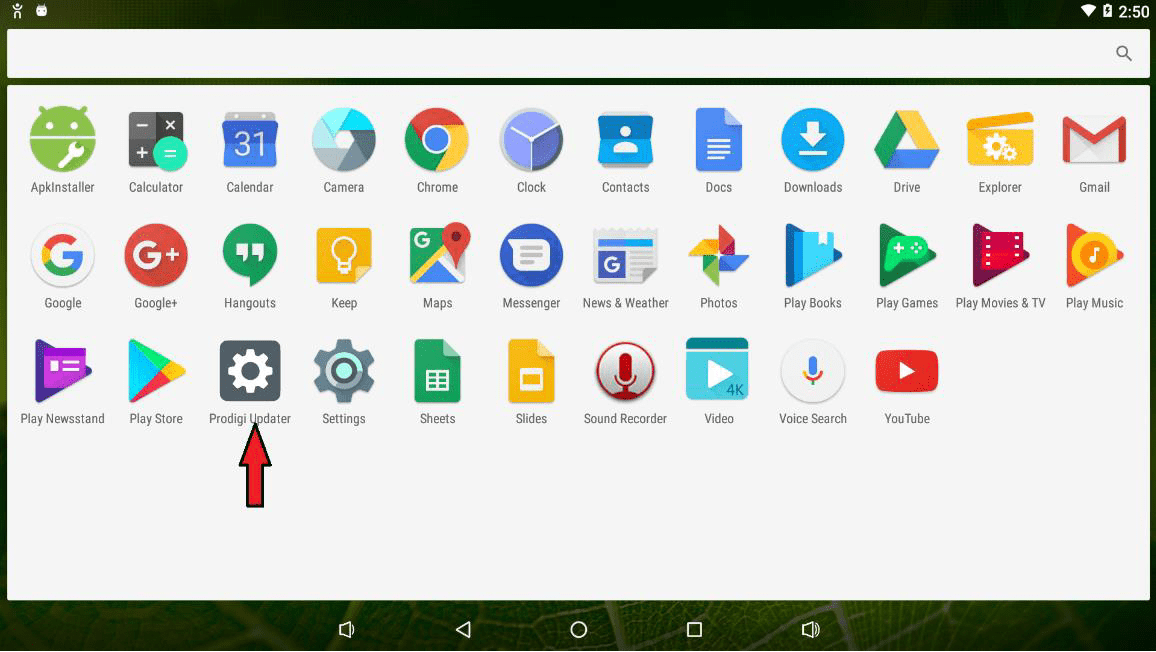
Connect the tablet to a computer and check the check box: “Always allow from the computer,” then click “OK” on the pop-up window. Go into the Application window and tap the Prodigi Updater icon to install the Prodigi suite. Tap on install.
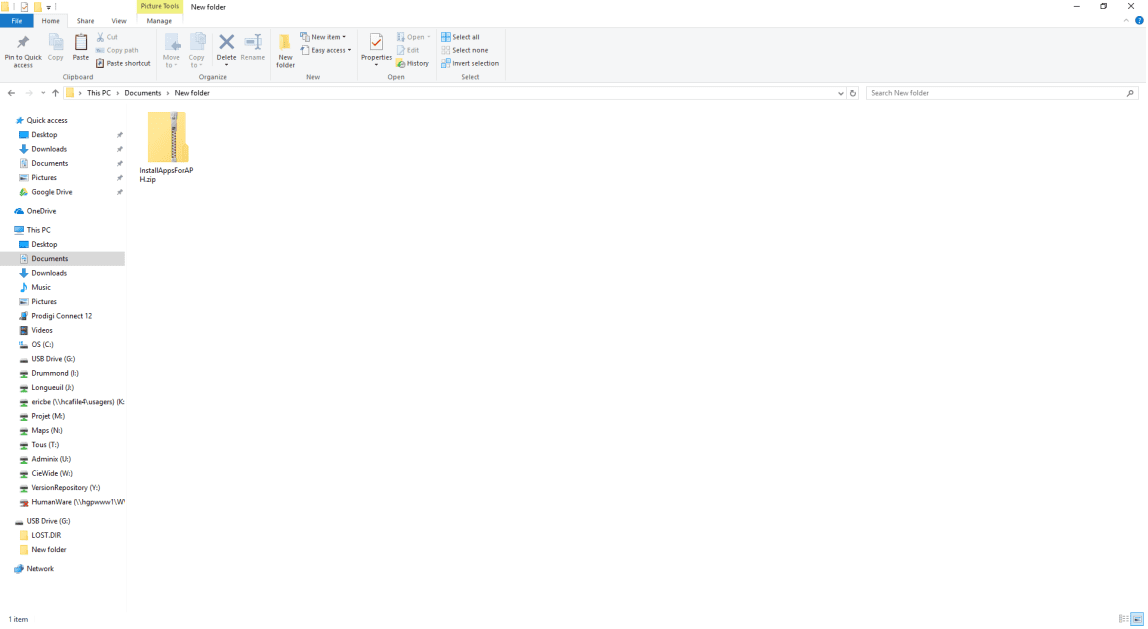
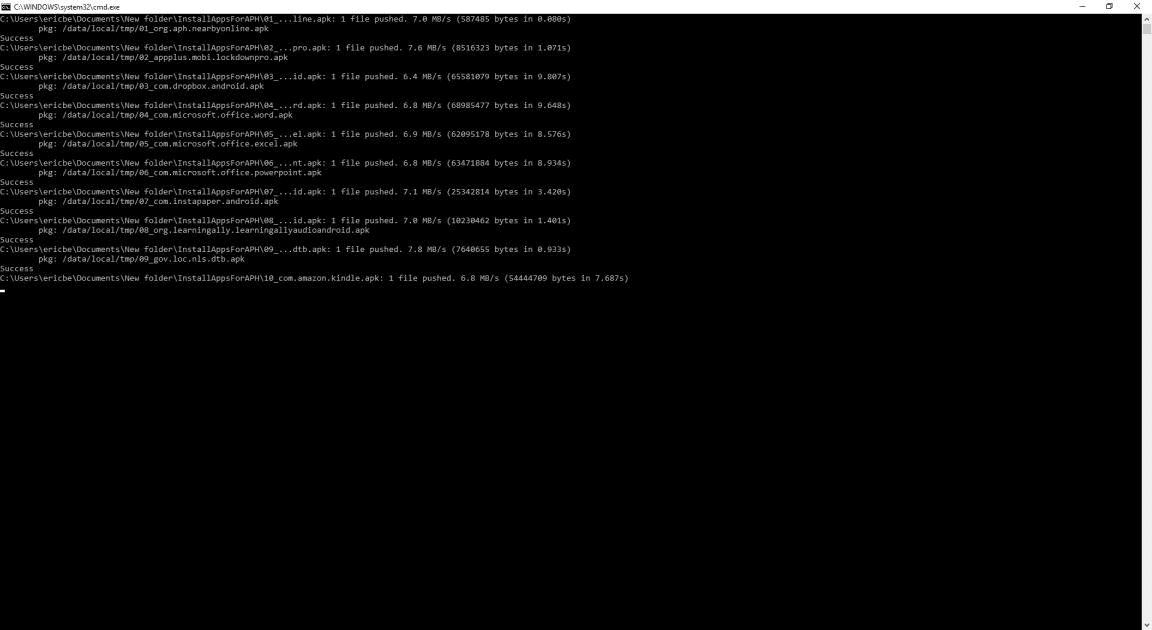
When Prodigi is finished installing, execute the InstallAppsForAPH.bat file by double-clicking it from the connected computer. The APH applications will now be installed. To get the InstallAppsForAPH.bat file, you need to extract the InstallAppsForAPH.zip file to the connected computer. You cannot execute the InstallAppsForAPH.bat file if the ZIP file is not extracted. Go to step 8 to learn how to extract the file.
Copy the ZIP file to a folder on the connected PC.
Right-click on the file and select Extract All. The files will be extracted from the folder. Rev 1.0
In the extracted folder, the file InstallAppsForAPH.bat will be found.
To install the APH applications, double-click the InstallAppsForAPH.bat file; this will open a CMD prompt for Windows.
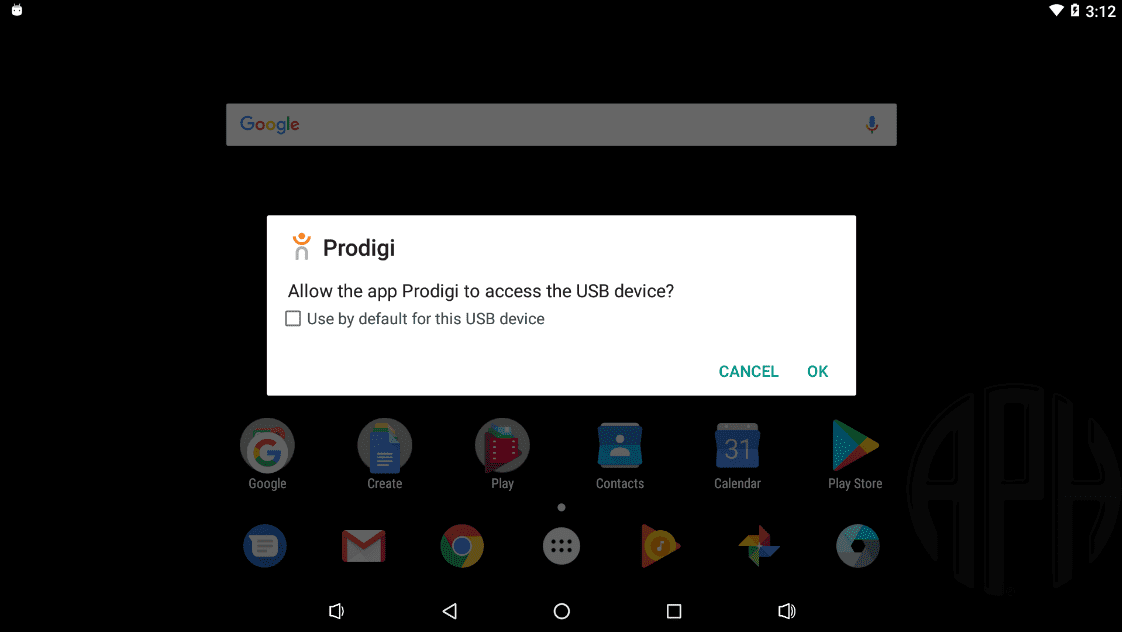
If the following window appears on the tablet, check the check box: “Use by defaults for this USB device” and then tap “OK.”
Prodigi can be started, and the applications should all be installed.
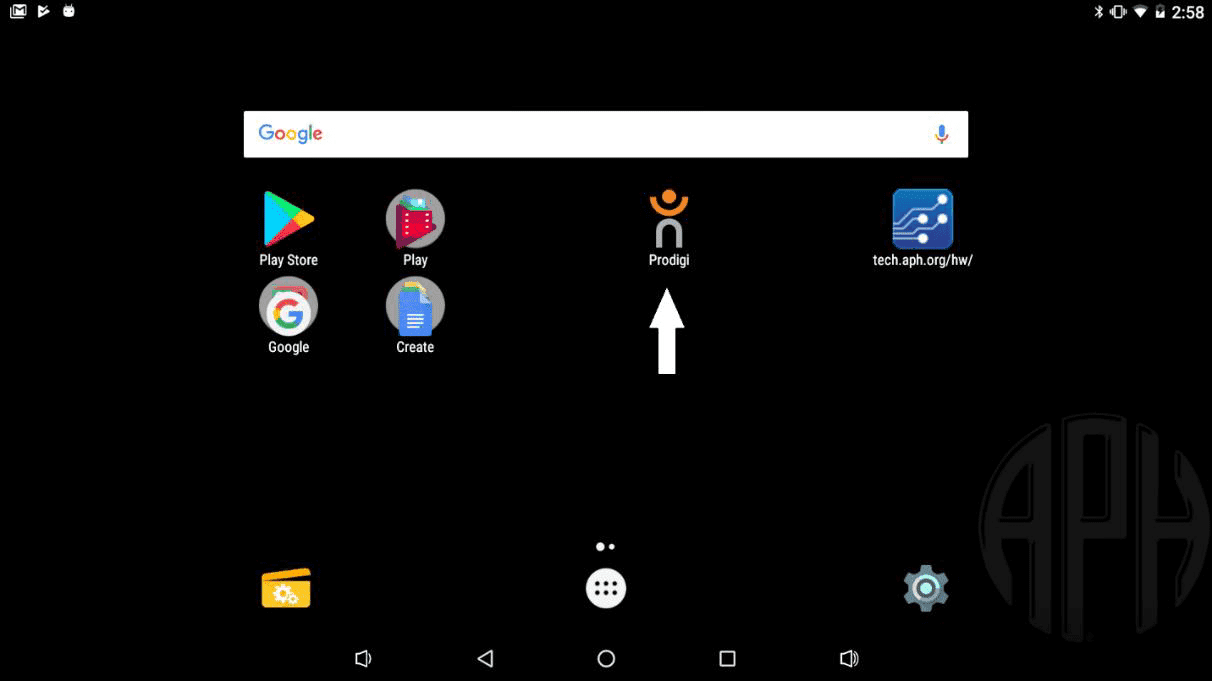
The applications on the tablet desktop can be rearranged, as shown below, by dragging the applications to the correct positions. Chrome needs to be started to create a tech.aph.org/hw/ bookmark on the desktop. The address tech.aph.org/hw/ needs to be input in the address field of Chrome – then select “Add to Home screen” using the three dots at the top right of the Chrome window.
Your tablet will now be fully reset to its factory state for Android and Prodigi. You can now complete customization for the user. Rev 1.0
v2.1 Tablets
A note before starting: You can avoid full factory resets in the future by creating an “Administrative” Google account, followed by student or user accounts. Doing so lets you remove the student/user accounts and create new ones without resetting the tablet. Go to Settings -> System -> Multiple Users to establish this tablet setup.
Instructions for v2.1 Tablets
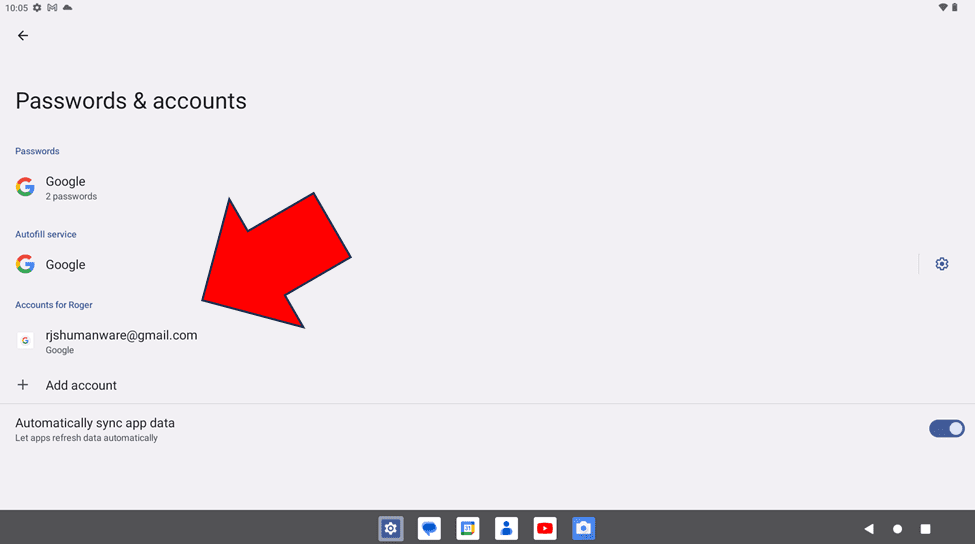
Before executing the Factory Reset of the tablet, enter Android to make sure that any Google accounts that are active on the tablet are removed by going into Settings -> Passwords & Accounts -> a list of accounts will appear:
Tap on the account(s) to remove. Follow the onscreen directions to remove the account(s). If you require them, you will be warned about the removal process and may be prompted for your PIN code or password.
Once the account(s) is removed, return to Settings and tap on System -> Reset options. Choose “Erase all data (factory reset).” Follow the onscreen directions to perform the factory reset. You will be warned about the reset process and may be prompted for your PIN code or password. The tablet will reboot.
Once the tablet has rebooted, you will be returned to the activation process, including an Android setup wizard and Prodigi software installation. Follow the onscreen instructions through this process.
Your tablet will now be fully reset to its factory state for Android and Prodigi. You can now complete customization for the user.
How do I pair my distance camera to the MATT Connect?
About: Kodak SL10 or SL25 Distance Camera and Connect Tablets
You don’t need any additional apps for Kodak camera installation in Prodigi software. Your MATT Connect is compatible with both camera models, but you can only pair one camera at a time. Make sure to use Prodigi software version 1.5.1, or higher, when using Kodak cameras.
Instructions: Wireless Pairing Kodak Cameras to Connect Tablets
Charge the camera initially.
Turn on the Kodak camera by pressing the power button, and the lens will deploy.
On your Connect tablet, navigate Prodigi: Settings → System → Wi-Fi Setup → Wi-Fi Networks.
Look for Kodak PIXPRO-SL10_XXXX “network” (no internet required).
For SL25 model, select PIXPRO-SL25_XXXX.XXXX represents unique characters distinguishing cameras of the same make but on a unique channel.IF you do not see your camera, tap “Scan for Wi-Fi.”
Tap on the camera “network” being paired. Then tap “Connect”.
Enter the pairing code: 12345678 and tap Connect to pair.
The Distance application will automatically be added to the Prodigi carousel.
Note 1: If a Sony QX camera was previously installed on the Connect tablet, uninstall the Sony PlayMemories app before pairing a Kodak SL camera.
Note 2: Only one camera can be used at a time, even if many are paired. Power on the required camera for the session and turn off the second camera.
Note 3: HumanWare provides special software for Kodak cameras. Off-the-shelf cameras won’t work with Connect devices.
Note 4: To enable video functionality, install the Kodak PixPro application and insert a USB card to save files. Connect devices do not support video capabilities.
How do I whitelist my MATT Connect?
School administrators often use security features that limit what websites are available to use on their network. To connect your MATT Connect to school Wi-Fi, you may need to work with your administrators to add the magnifier to the network’s whitelist. A whitelist limits users to only pre-approved websites or devices that are deemed safe for use on a secure network. When creating a whitelist for MATT Connect, Port 443 should not be blocked for https. Additionally, these sites/ports should be whitelisted:
The network will remember these websites, and you will not need to go through this process every time you connect to the network with your MATT Connect.
For warranty and non-warranty repairs or service, contact APH Customer Service at: 1-800-223-1839 (U.S. and Canada)
Email: support@aph.org
Hours: Monday–Friday 8:00am–8:00pm EST
")